Dotdigital
TikTok Shop connector allows you integrate with TikTok Shop in Tray.io and improve operational efficiency.
Overview
Dotdigital enables brands to engage subscribers and customers and drive record ROI through email, SMS, social media, push notifications, and even live chat.
Authentication
To use the Dotdigital connector, go to your Tray.io account page and select the workflow you wish to work on. Once in the workflow builder, search for and drag the Dotdigital connector from the connectors panel (on the left) onto your workflow.
With the new Dotdigital connector step highlighted, in the properties panel on the right, click the Authenticate tab and 'Add new authentication' (located under the 'Authentication' field).
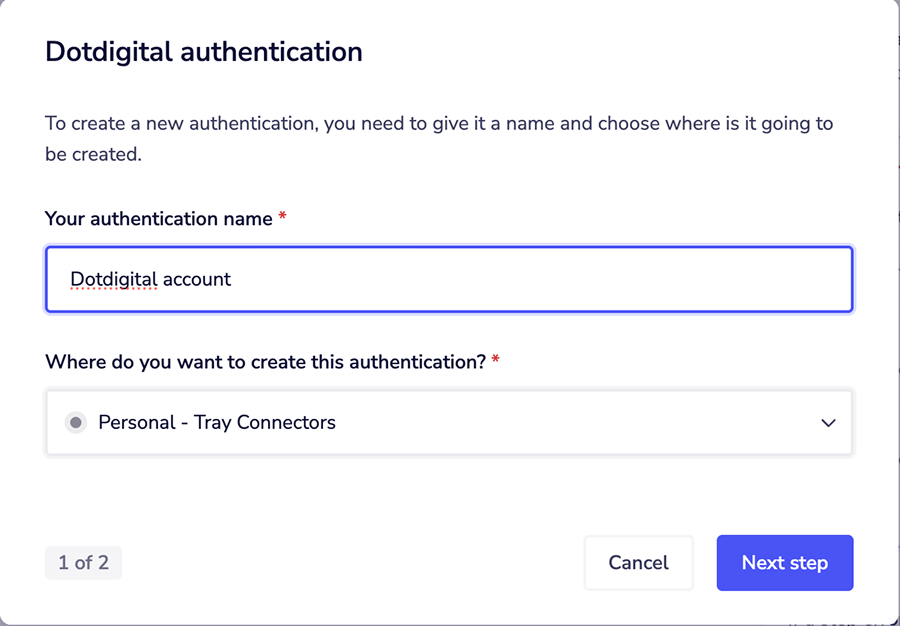
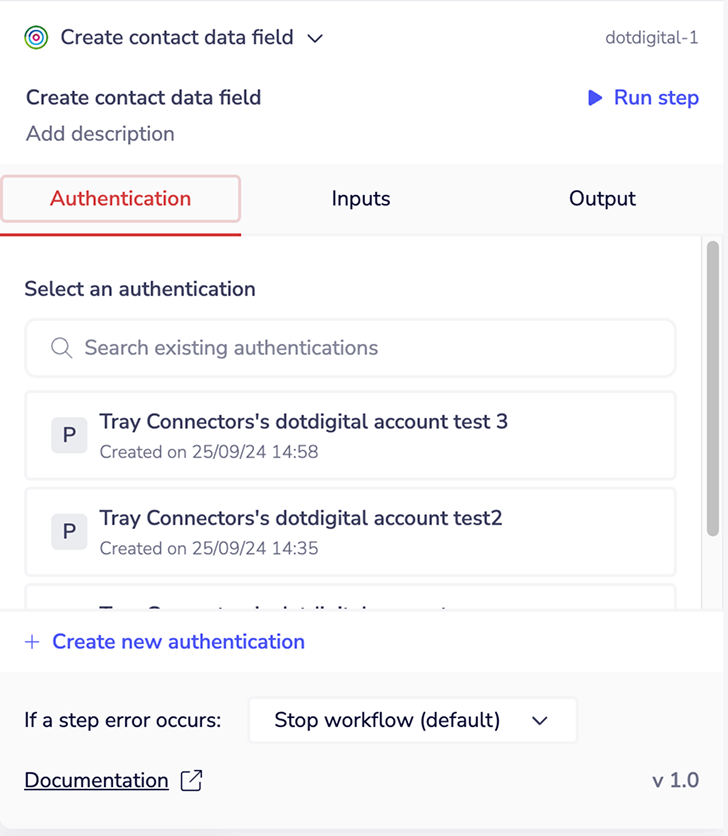 This will result in a Tray.io authentication pop-up window. The first page will ask you to name your authentication, and state which type of authentication you wish to create ('Personal' or 'Organisational').
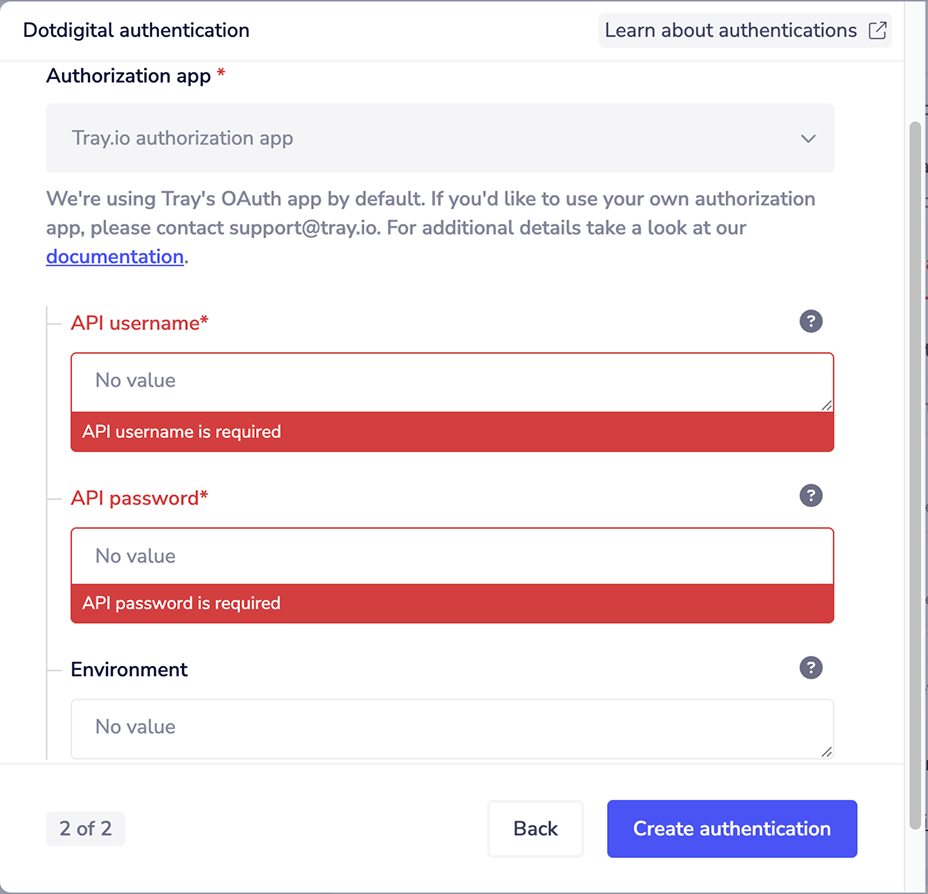
 The next page asks you for your 'API username', 'API password', and 'Environment' if you want to provide one.
 To get these fields, head to your Dotdigital dashboard. You will need to set up your API user. Expand the User menu in the bottom left and go to Settings > Access > API users.
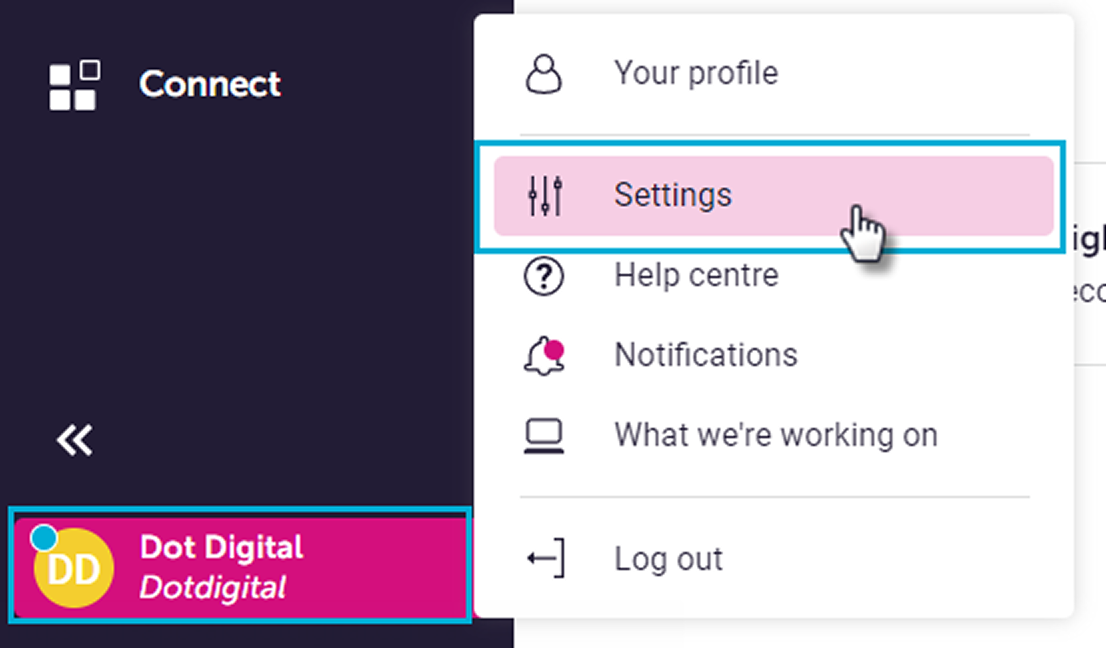 Select a NEW USER*.*
 The username (email address) is automatically generated for you and must not be edited. You can add a description to differentiate between API users, which is useful if you have more than one.
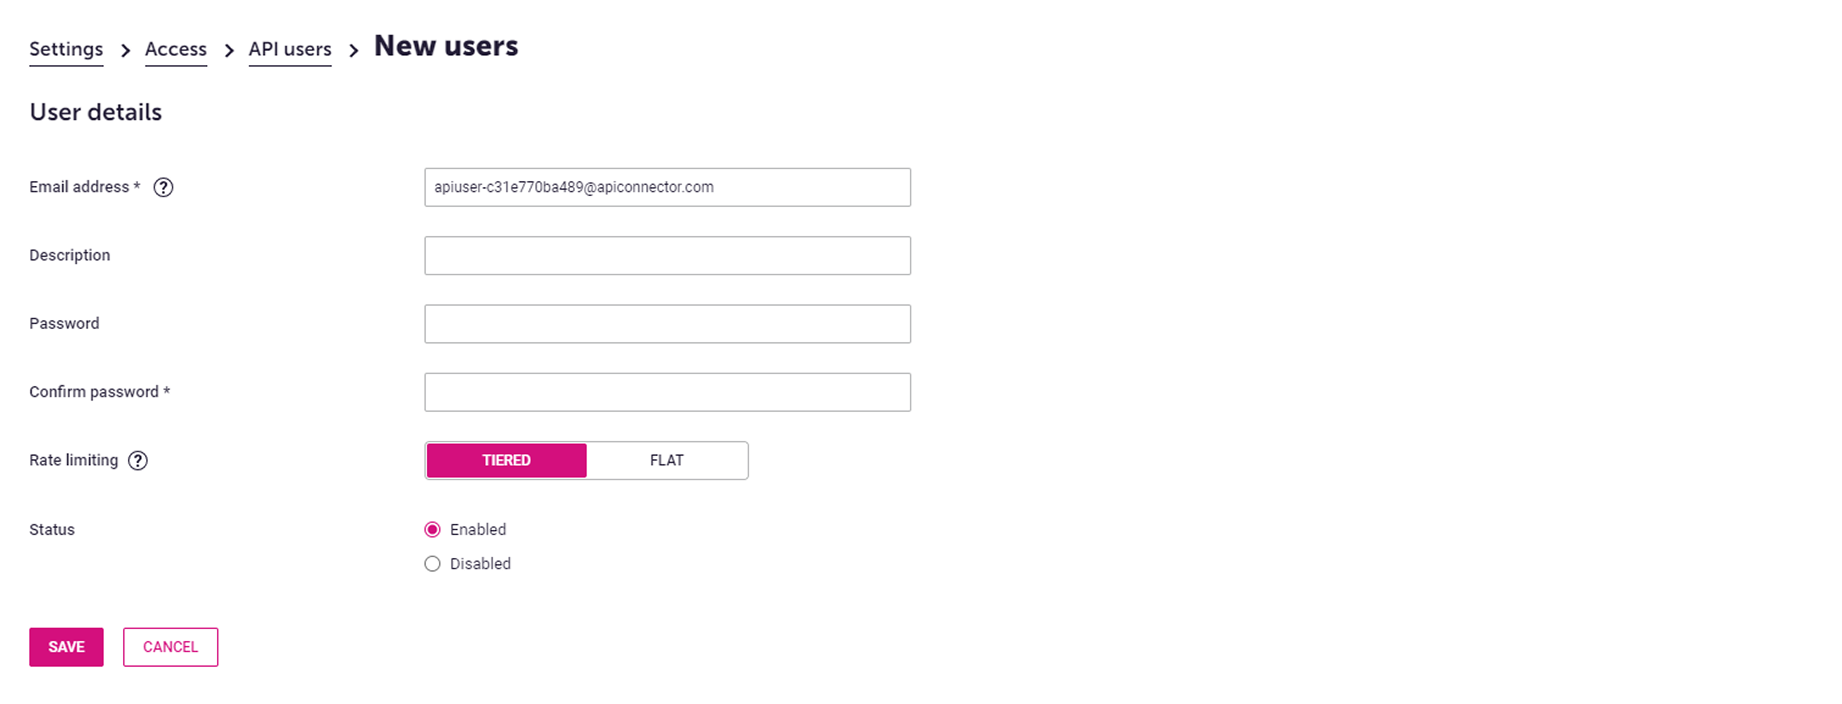 Enter a password and confirm it. Your password must be at least eight characters in length and contain at least one digit or non-alphanumeric character. Please avoid including your email address or company name as part of your password.
For Status, select Enabled.
Then click on the save button.
The 'Environment' field is optional and doesn't need to be entered.
Once you have added these fields to your Tray.io authentication popup window, click the 'Create authentication' button. Go back to your settings authentication field (within the workflow builder properties panel), and select the recently added authentication from the dropdown options.
Your connector authentication setup should now be complete.
Available Operations
The examples below show one or two of the available connector operations in use. Please see the Full Operations Reference at the end of this page for details on all available operations for this connector.
Using the Raw HTTP Request ('Universal Operation')
With the Raw HTTP Request, you can effectively create your operations.
This is a very powerful feature that you can put to use when there is an endpoint in Dotdigital that is not used by any of our operations.
To use this you will first of all need to research the endpoint in the Dotdigital REST API documentation, to find the exact format that Dotdigital will be expecting the endpoint to be passed in.
Note that you will only need to add the suffix to the endpoint, as the base URL will be automatically set. The connector automatically connects to the API to determine your base URL which is based on your region.
The base URL is https://\{\{region\}\}-api.dotmailer.com, where \{\{region\}\} is the region that your account belongs to.
The connector automatically retrieves your region information, but if you would also like to retrieve this you can do so via the Dotdigital app. Via the app: Click on the person-and-cog icon in the bottom left corner of the application to produce the settings menu, select Access, and then click on the API users tab. Here you'll find your API endpoint. Only account owners or admin users (users with the 'Can manage account' permission enabled) will have Access available though.
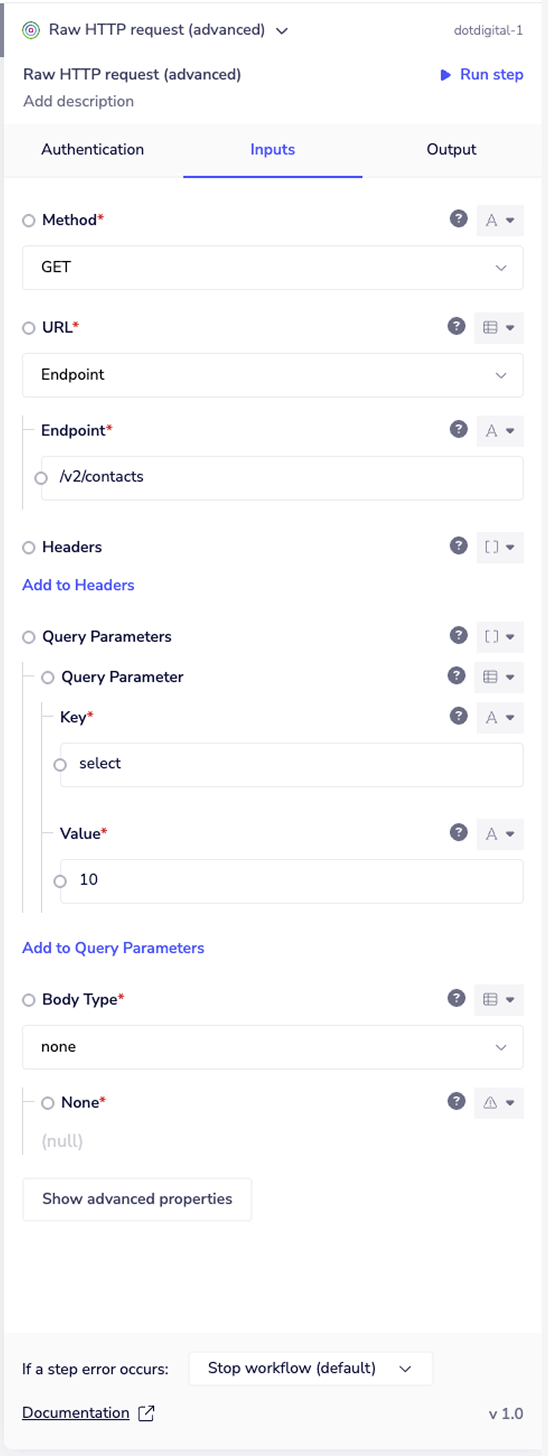
For an example of using the raw HTTP request to create an operation, let's say that the 'List contacts' operation did not exist in our Dotdigital connector, and you wanted to use this endpoint. You would use the Dotdigital API docs to find the relevant endpoint - which in this case is a GET request called: /v2/contacts.
More details can be found here.
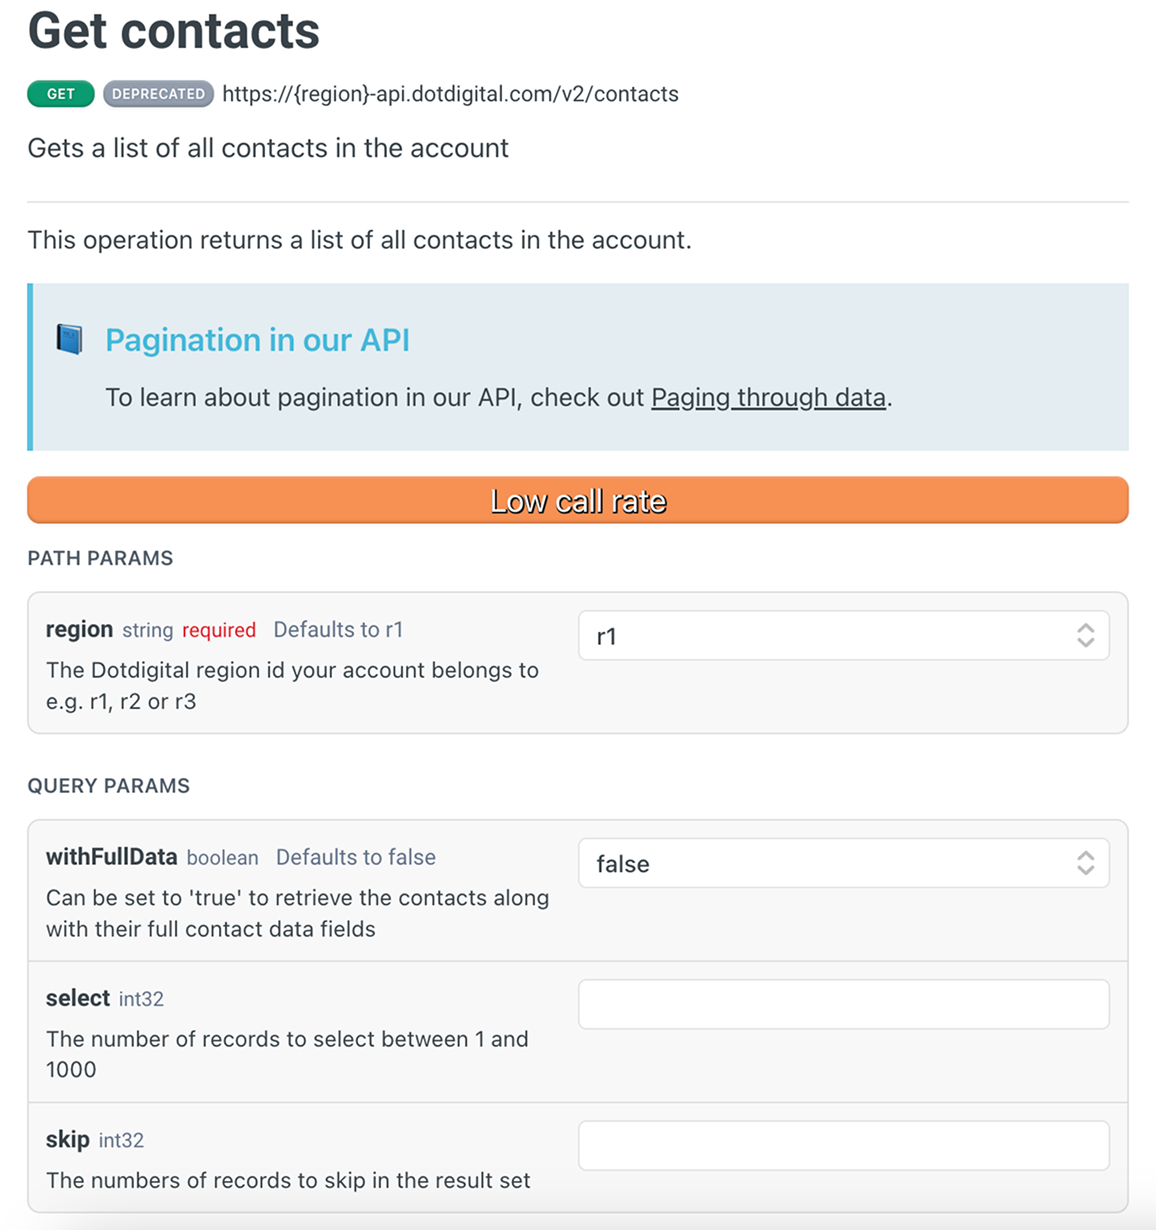 As you can see there is also the option to include a query parameter, should you wish to do so. For this example, we will set the
 select parameter to 20 to retrieve 20 contacts from the API. So if you know what your method, endpoint, and details of your query parameters are, you can get the list of all contacts in your account with the following settings:
Method: GET
Endpoint: /v2/contacts
Query Parameter: Key: select Value: 10
Body Type: none
The final Example outcome is: https://r2-api.dotmailer.com/v2/contacts?select=20
