QuickBooks
Accounting software.
Overview
QuickBooks is an accounting software package developed and marketed by Intuit.
API Information
The Quickbooks connector has the following Base URL: https://quickbooks.api.intuit.com. More information can be found on their main API documentation (v3) site. Details regarding their API limitations can be found here.
QuickBooks templates
Please note that we have the following QuickBooks templates available: These will give you pre-configured best practice ways of working with QuickBooks and integrating it with other connectors. However, please continue to at least read the Authentication setup instructions on this page to enable you to get started with using QuickBooks.
Authentication
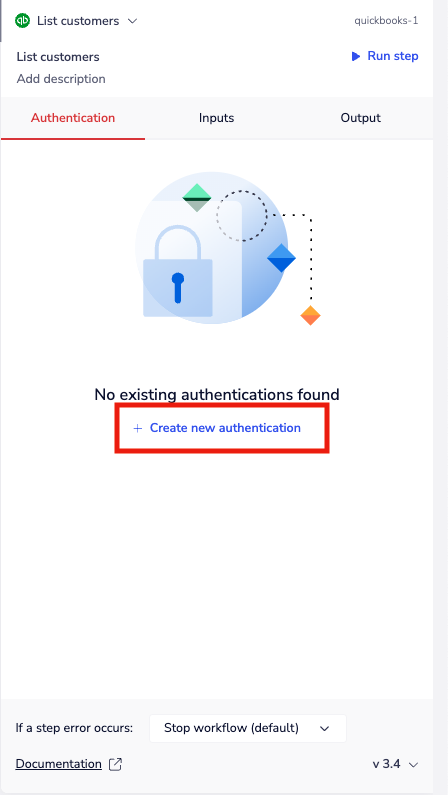
When using the QuickBooks connector, the first thing you will have to do is click on 'Create new authentication' in the step editor:
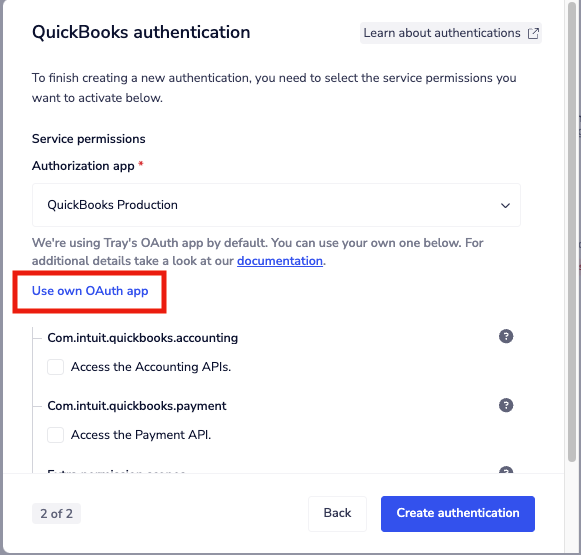
Important! Starting 1 Nov 2025, all customers must use their own OAuth app. In the environment picker, select Use own OAuth app and follow the steps below to configure it. (The shared Development/Production options will not be supported after 1 Nov 2025.)
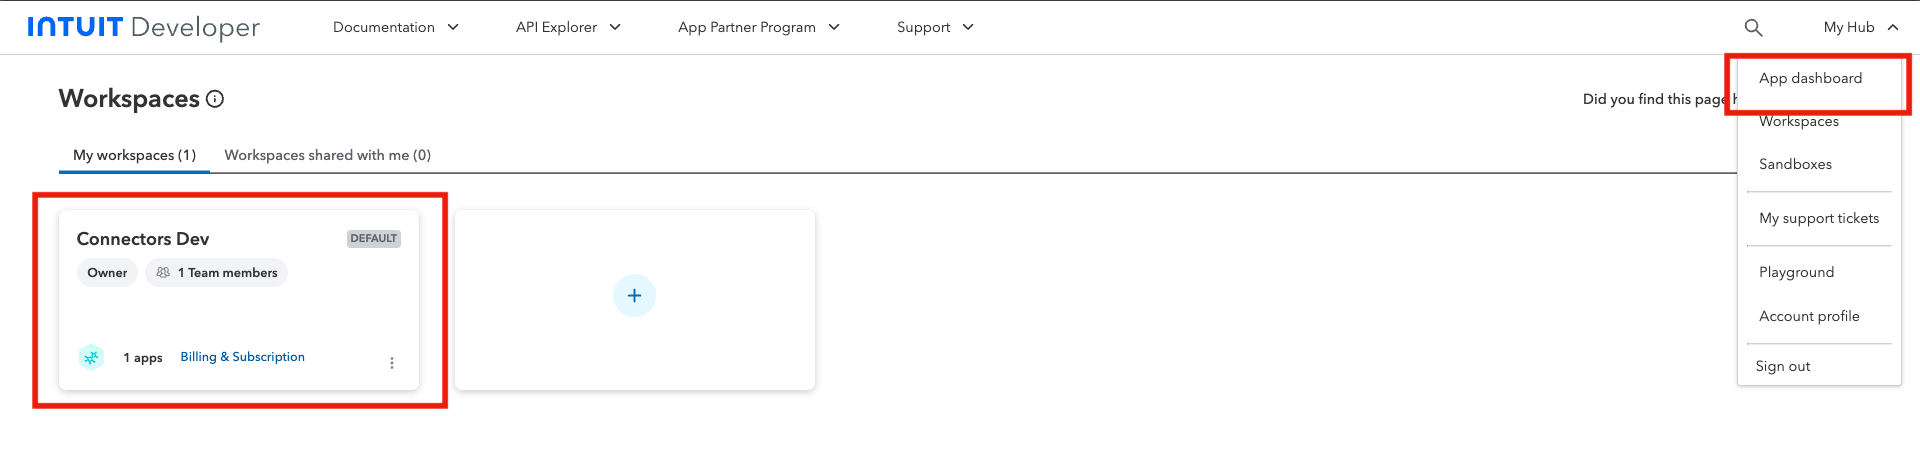
Give your app a name and description, then click ***Next***. You’ll be asked to provide an App Key and App Secret, which require an Intuit account. Once you’ve logged in, create a **workspace** if you don’t already have one. After the workspace is created, you can access it in one of two ways:
- Click directly on the workspace, or
- Open the “My Hub” dropdown in the top-right corner and select “App Dashboard”.
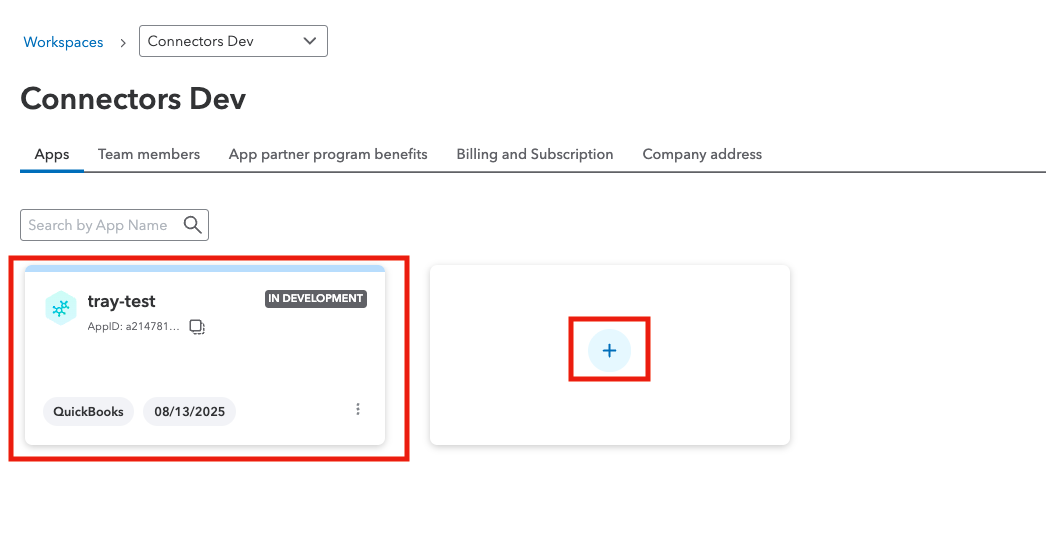
 After that you'll be able to click on existing apps or create a new one by hitting the "+" sign.
When creating a new app you have to give it a name, then enable the needed permissions scopes and hit done. Next, we need to set the redirect URI.
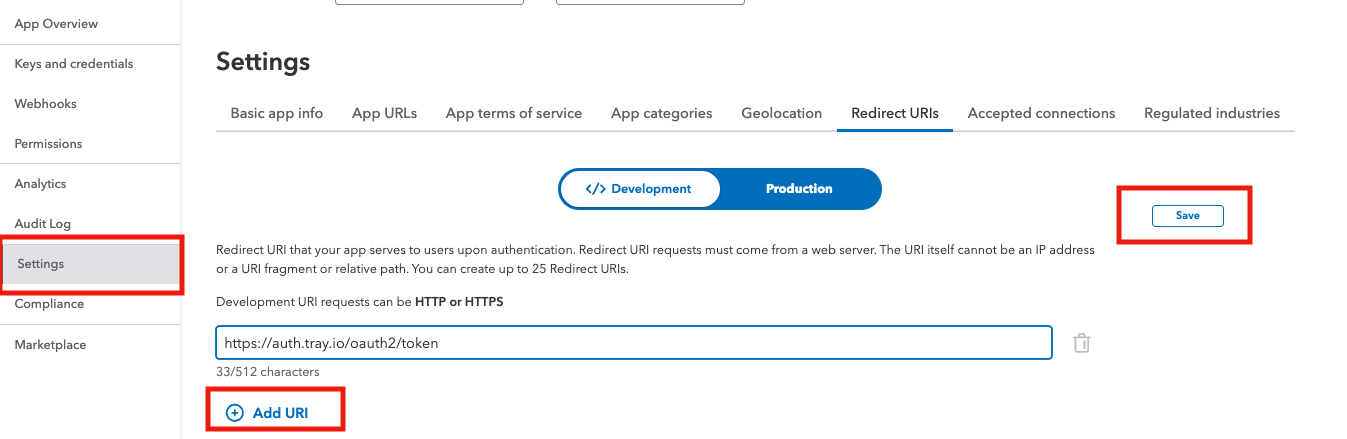
Click on "Settings" from the menu on the left, in there you will need to add an URI by clicking the "Add URI" button. Make sure to add **https://auth.tray.io/oauth2/token **in to the URI input and hit "Save"(make sure to toggle between "Development" and "Production" as needed).
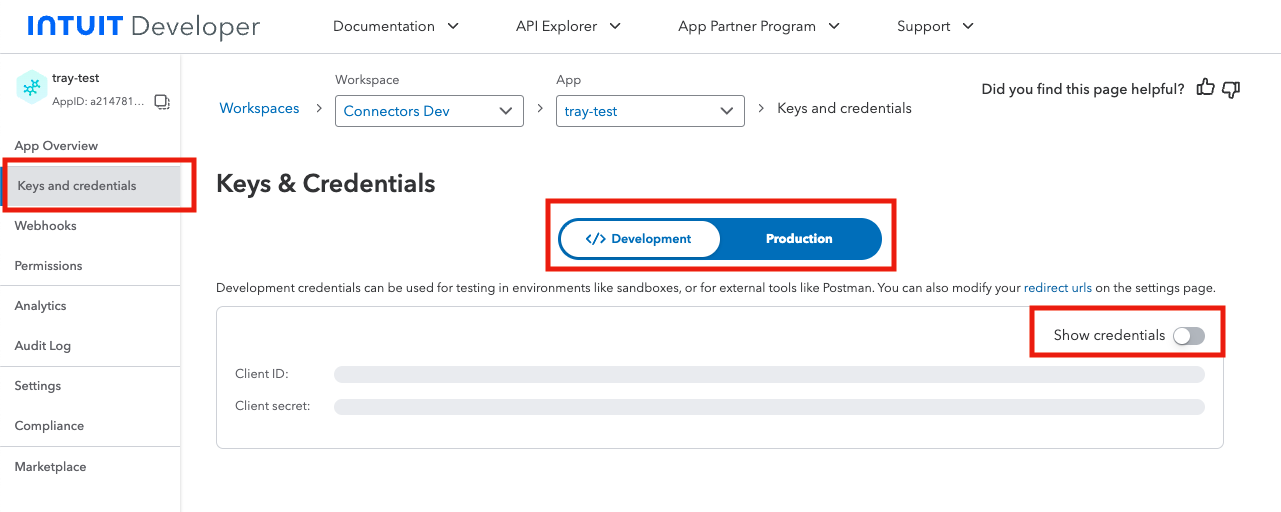
Next we'll get our Client ID and Client Secret.
After you got your Client Id and Client Secret, return to the Tray app and fill in the required fields
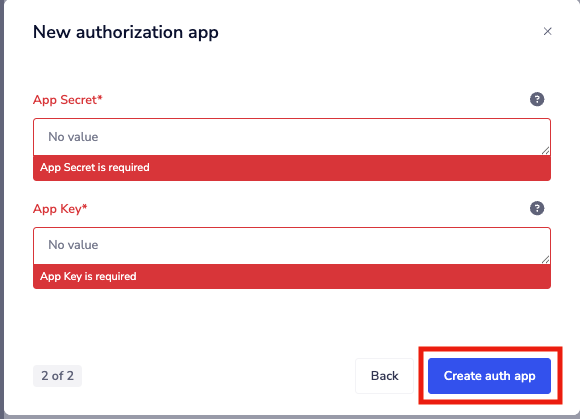 Then hit "Create auth app"
Then click "Create authentication".
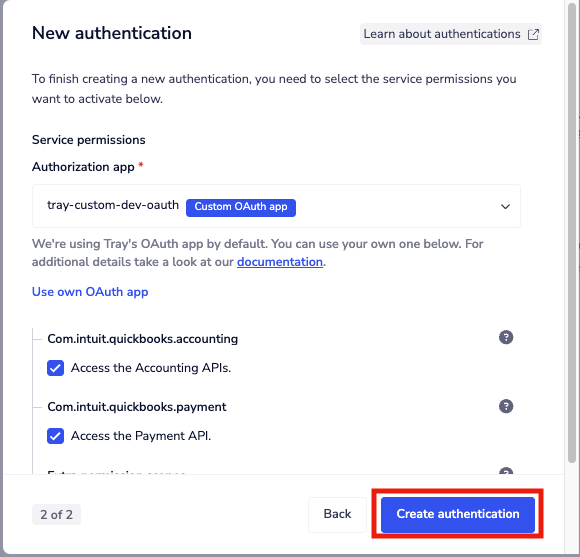
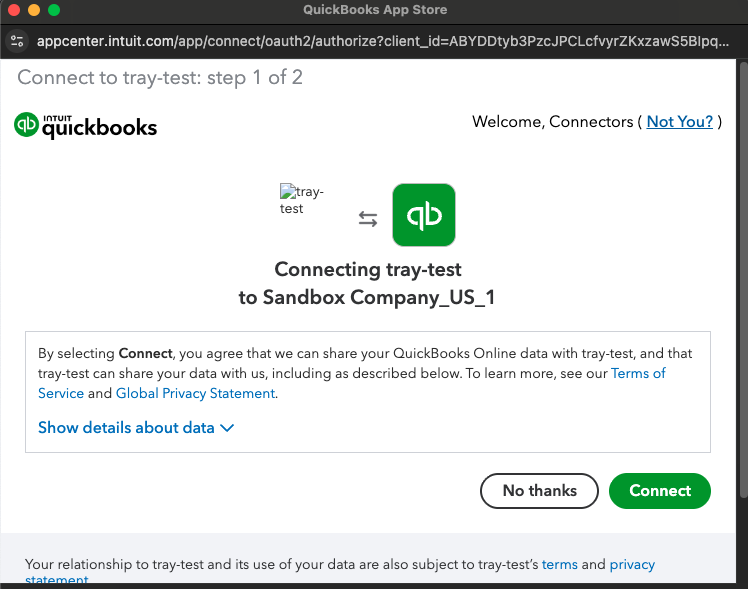
You will be prompted to review these permissions, then click "Connect".
 Once you approve, the authentication should be complete. Please run the simplest operation available to test and make sure you can retrieve data as expected.