Shibumi
Overview
Shibumi is a strategic program and portfolio management software.
**API Information **
The Base URL used for the Shibumi connector is https://app.shibumi.com/api/4.0/enterprise/\{\{{#auth.enterprise_id\}\}}/GraphQL/graphQL. More information can be found on their main API documentation v(4.0) site.
Authentication
Within the builder, click on the Shibumi connector to display the connector properties panel. Select the 'Auth' tab and click on the 'New authentication' button.
In the Tray.io authentication pop-up modal, name the authentication in a way that will quickly identify it within a potentially large list. For example, whether it is a Sandbox or Production auth, etc.
Consider who/ how many people will need access to this authentication when choosing where to create this authentication ('Personal' or 'Organisational').
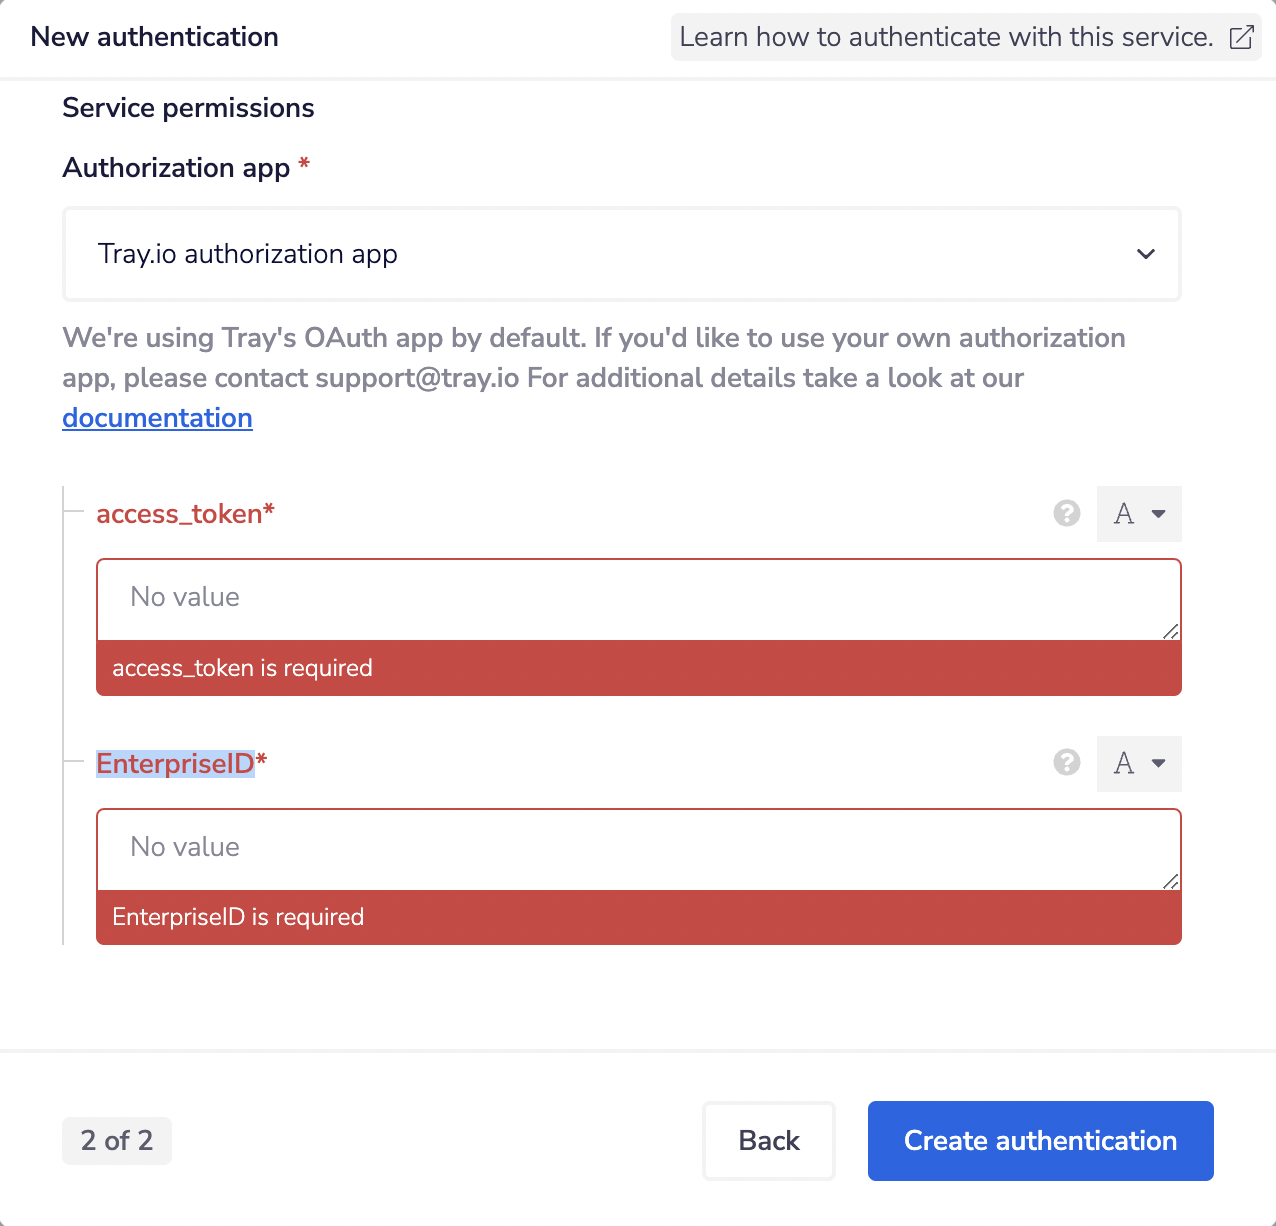
 The second page asks you for your 'EnterpriseID' and 'access_token' credentials.
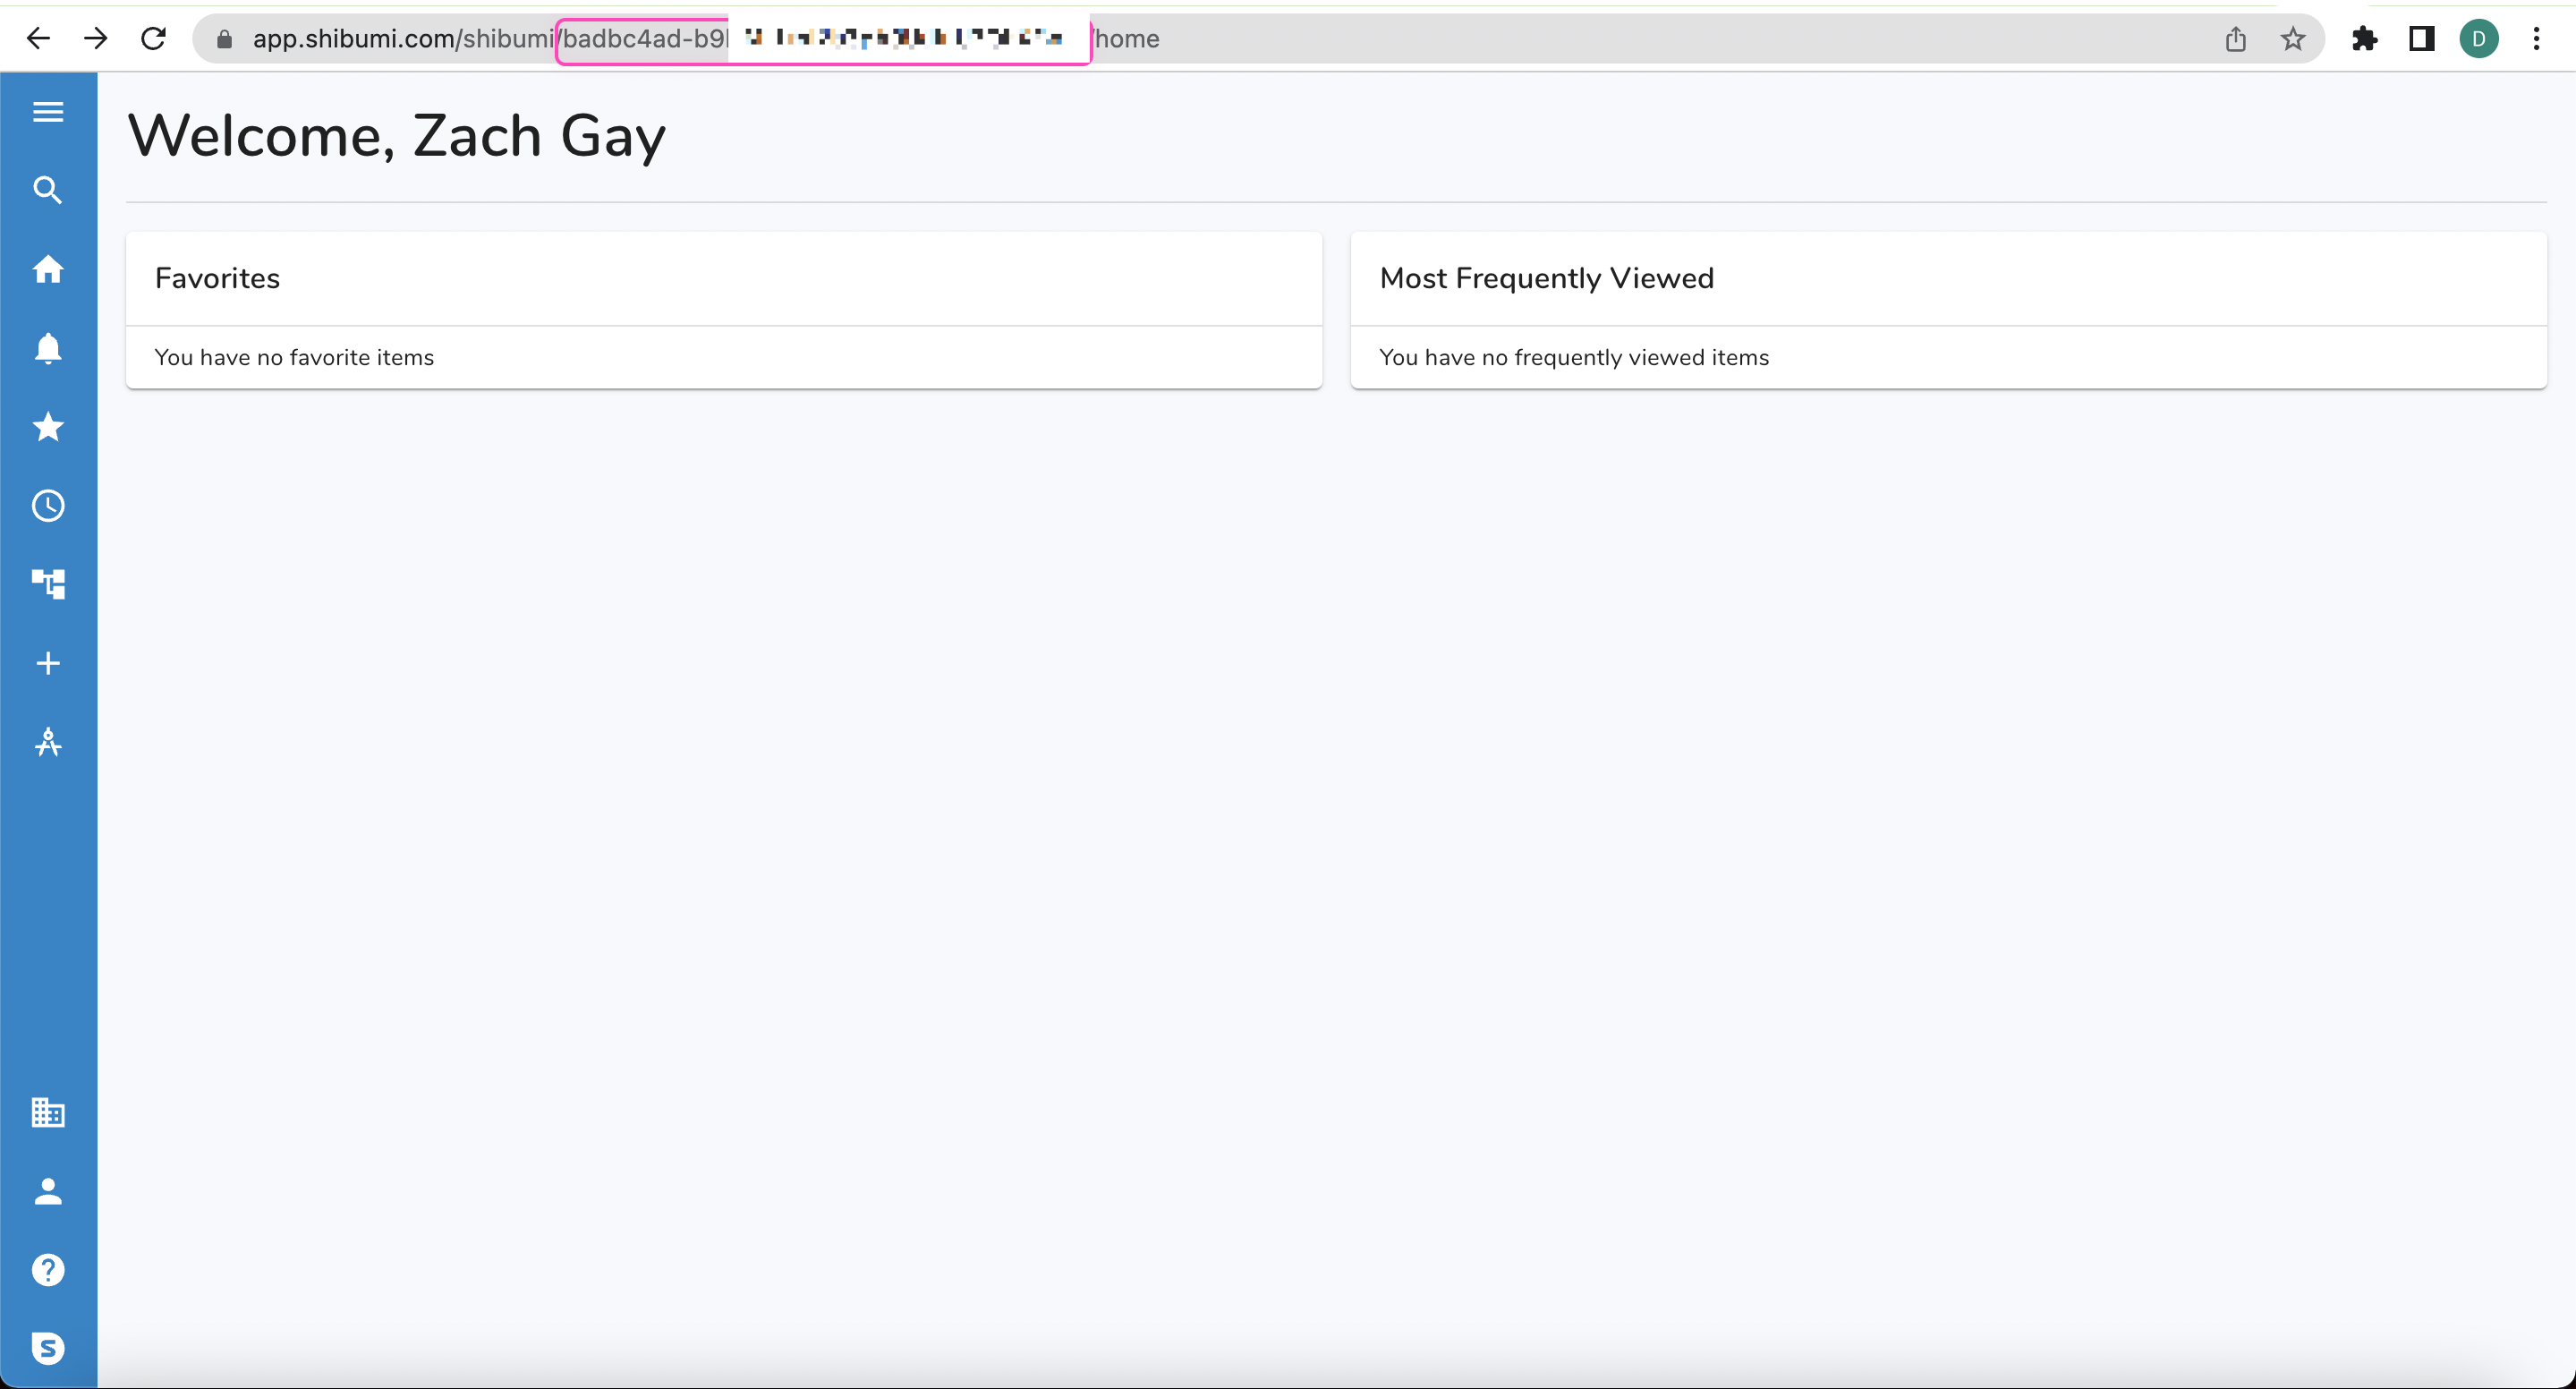
 To get the Enterprise ID, head to the Shibumi dashboard. Copy the highlighted section on the image. That would be your Enterprise ID.
 To get the 'Access token', request a 'Client ID' and 'Client secret' from your Shibumi contact. These should be stored in your script. Create a user in your Shibumi enterprise to represent your script. Scripts should typically have their own Shibumi user, rather than using credentials belonging to a human. As a separate user, they can be given access to a restricted set of instances, and their status won’t change if the employee’s status changes.
In your script, issue a post request to the following endpoint (or the appropriate endpoint for your environment):
To get the 'Access token', request a 'Client ID' and 'Client secret' from your Shibumi contact. These should be stored in your script. Create a user in your Shibumi enterprise to represent your script. Scripts should typically have their own Shibumi user, rather than using credentials belonging to a human. As a separate user, they can be given access to a restricted set of instances, and their status won’t change if the employee’s status changes.
In your script, issue a post request to the following endpoint (or the appropriate endpoint for your environment): https://app.shibumi.com/api/oauth2/token. Include the following fields in the post body: client_id, client_secret, username, password. The response will look like the following:
{ "accessToken": "some_token" }
Once you have added these fields to your Tray.io authentication pop-up window, click the 'Create authentication' button.
Your connector authentication setup should now be complete.
Example Usage
TRAY POTENTIAL: Tray is extremely flexible. By design there is no fixed way of working with it - you can pull whatever data you need from other services and work with it using our core and helper connectors.
Below is an example of a way in which you could potentially use the Shibumi connector, to create work items, update work items and delete work items. The overall logic of the workflow is:
- Setup using a manual trigger.
- Add the operation Create work item operation.
- Add operation Update work item operation.
- Add the operation Delete work item operation.
- Click on the run workflow button.
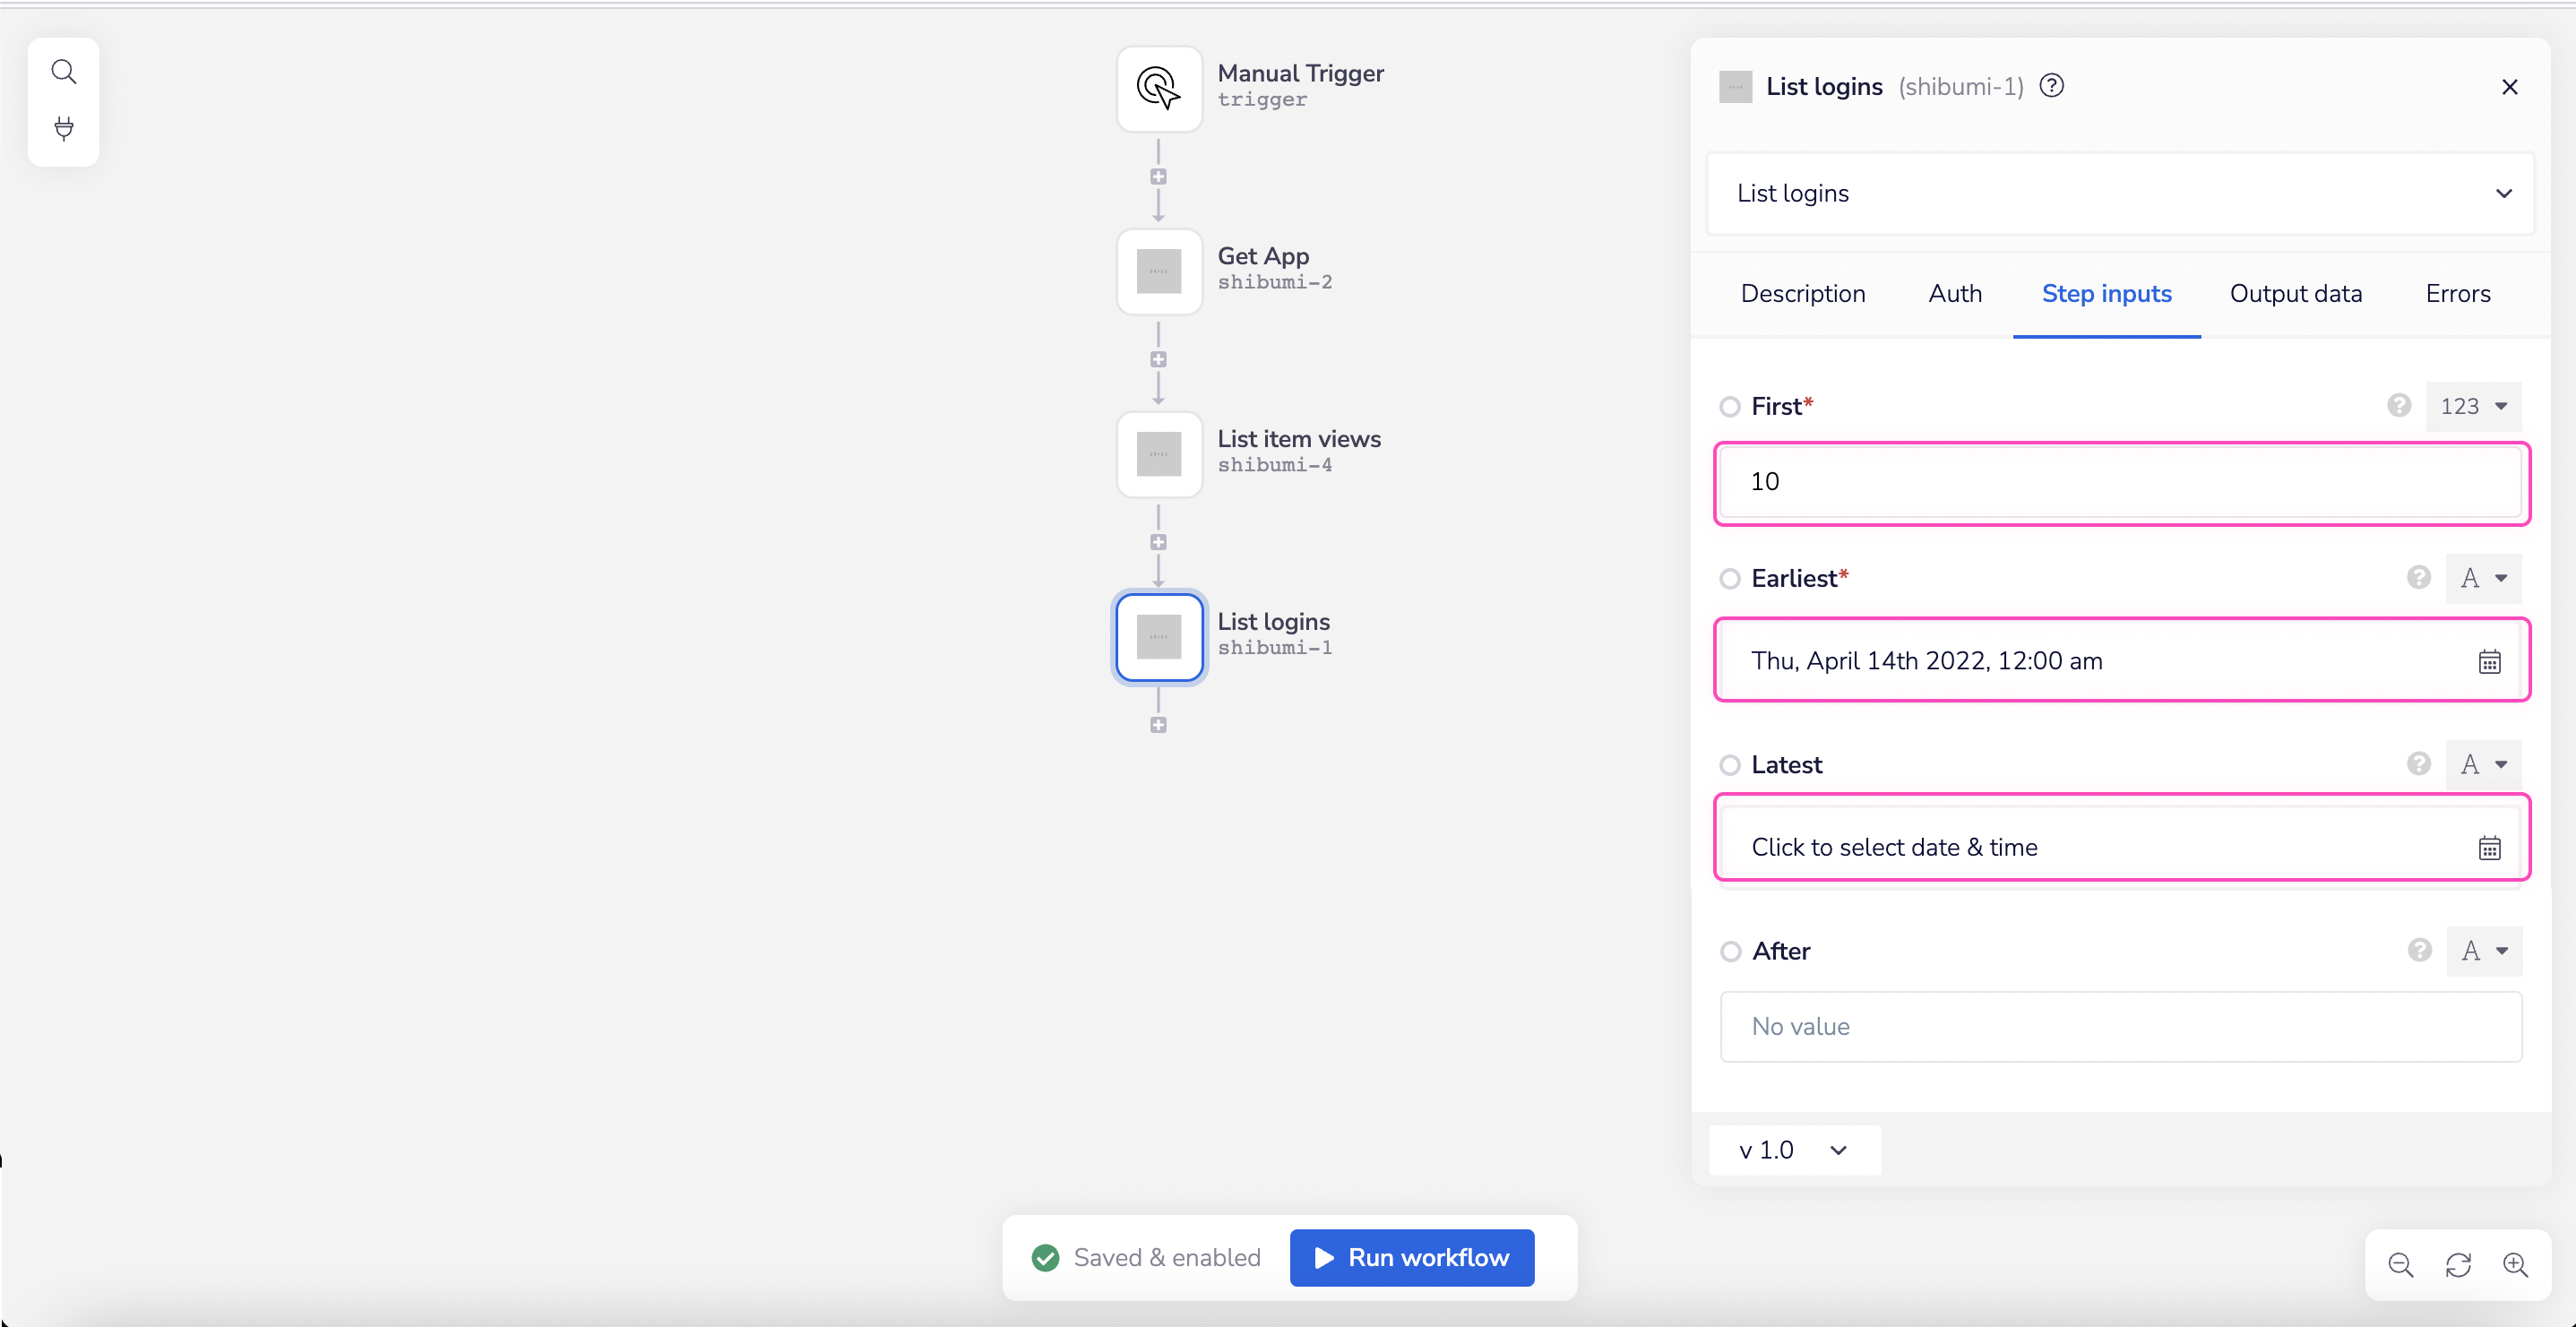
- The workflow would get the list of logins.
Your completed workflow should look similar to this:
1 - Setup Trigger & Create work items.
With your trigger in place (be it Manual, Scheduled, Callable etc) add a Shibumi connector. Set the operation to 'Create work items'.
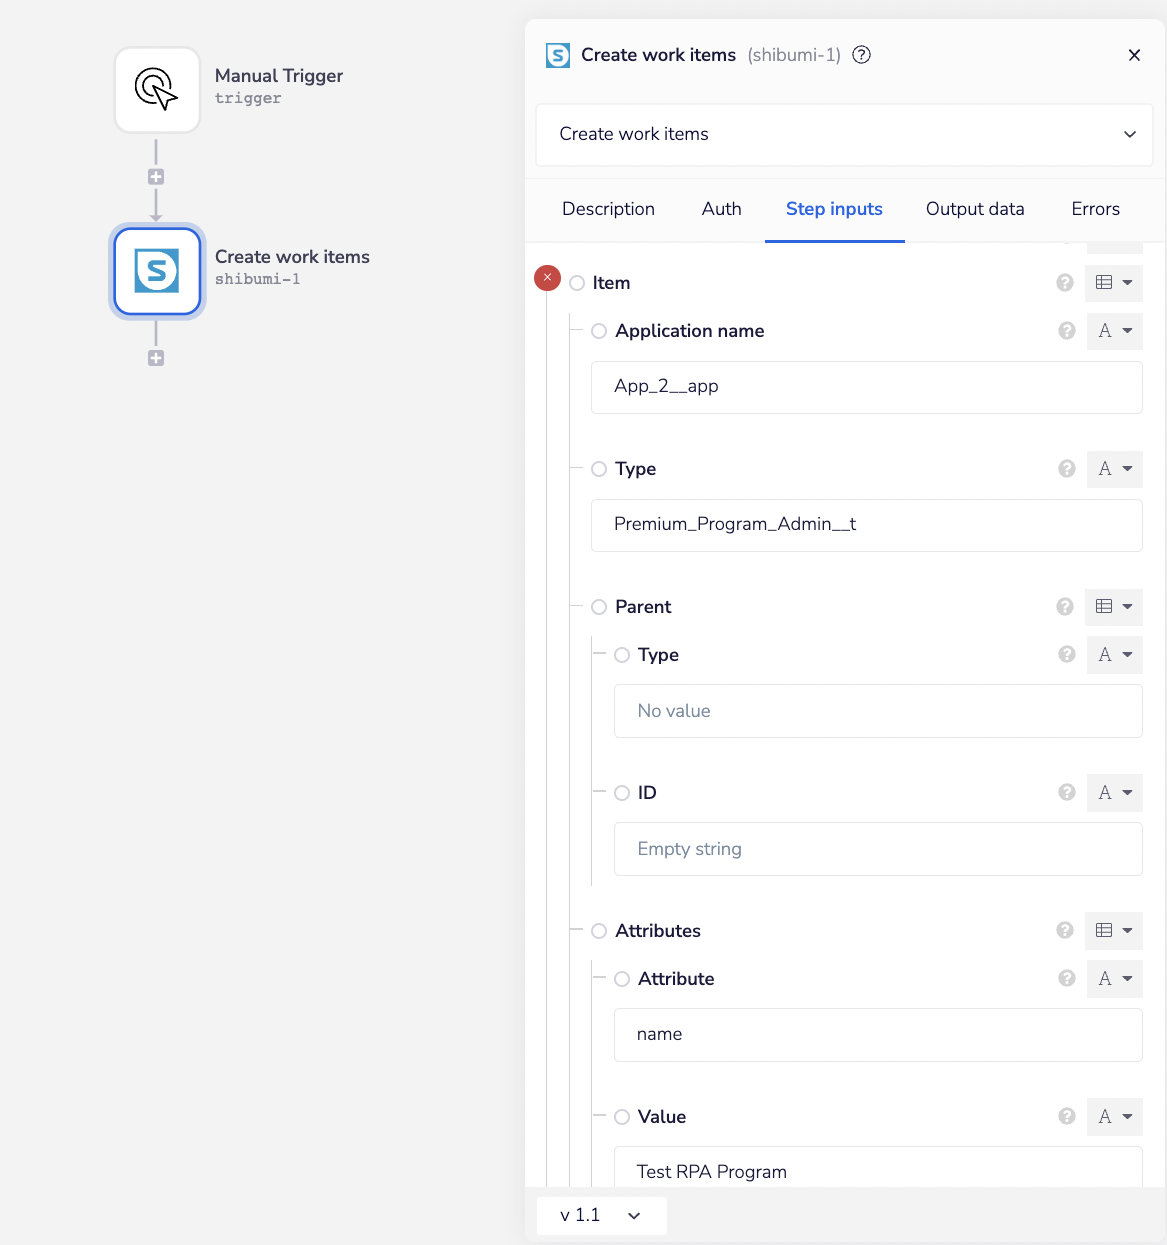 Feel free to re-name your steps as you go along to make things clearer for yourself and other users. The operation names themselves often suffice.
When run, this workflow creates work items in your Shibumi account.
Feel free to re-name your steps as you go along to make things clearer for yourself and other users. The operation names themselves often suffice.
When run, this workflow creates work items in your Shibumi account.
2 - Add operation Update work items.
Add the operation Update work items, fill in the step inputs
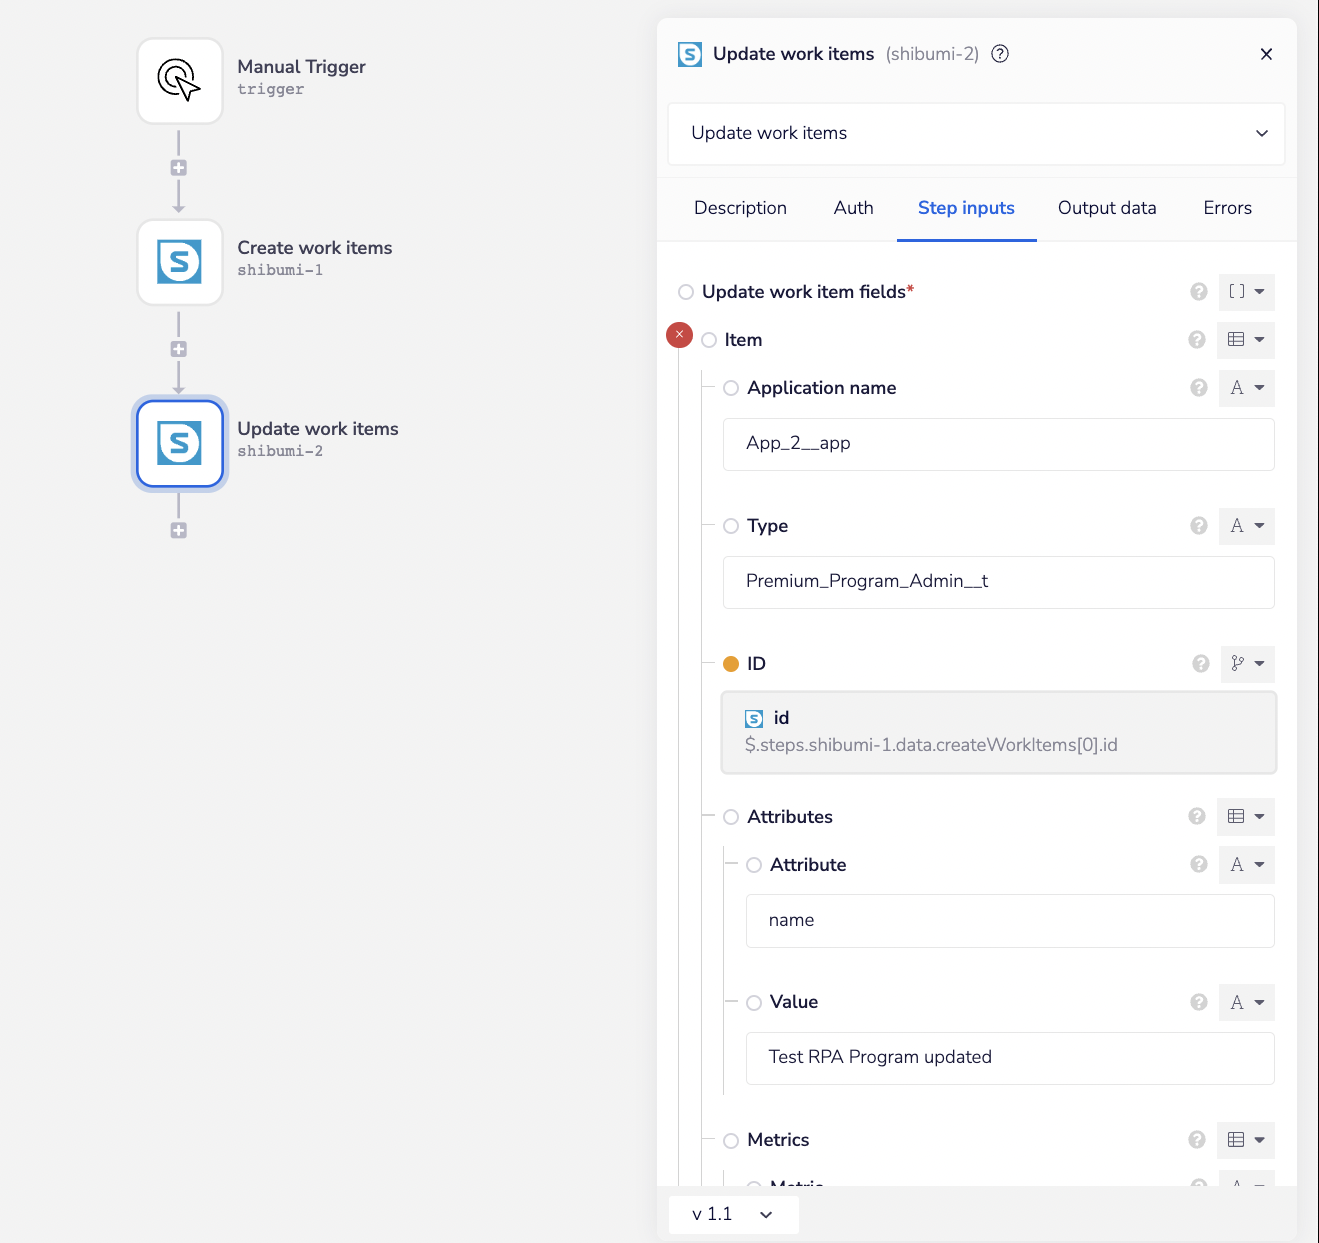 When run, this operation updates work items in your Shibumi account.
2 - Add operation Delete work items.
Add the operation Delete work items, fill in the step inputs.
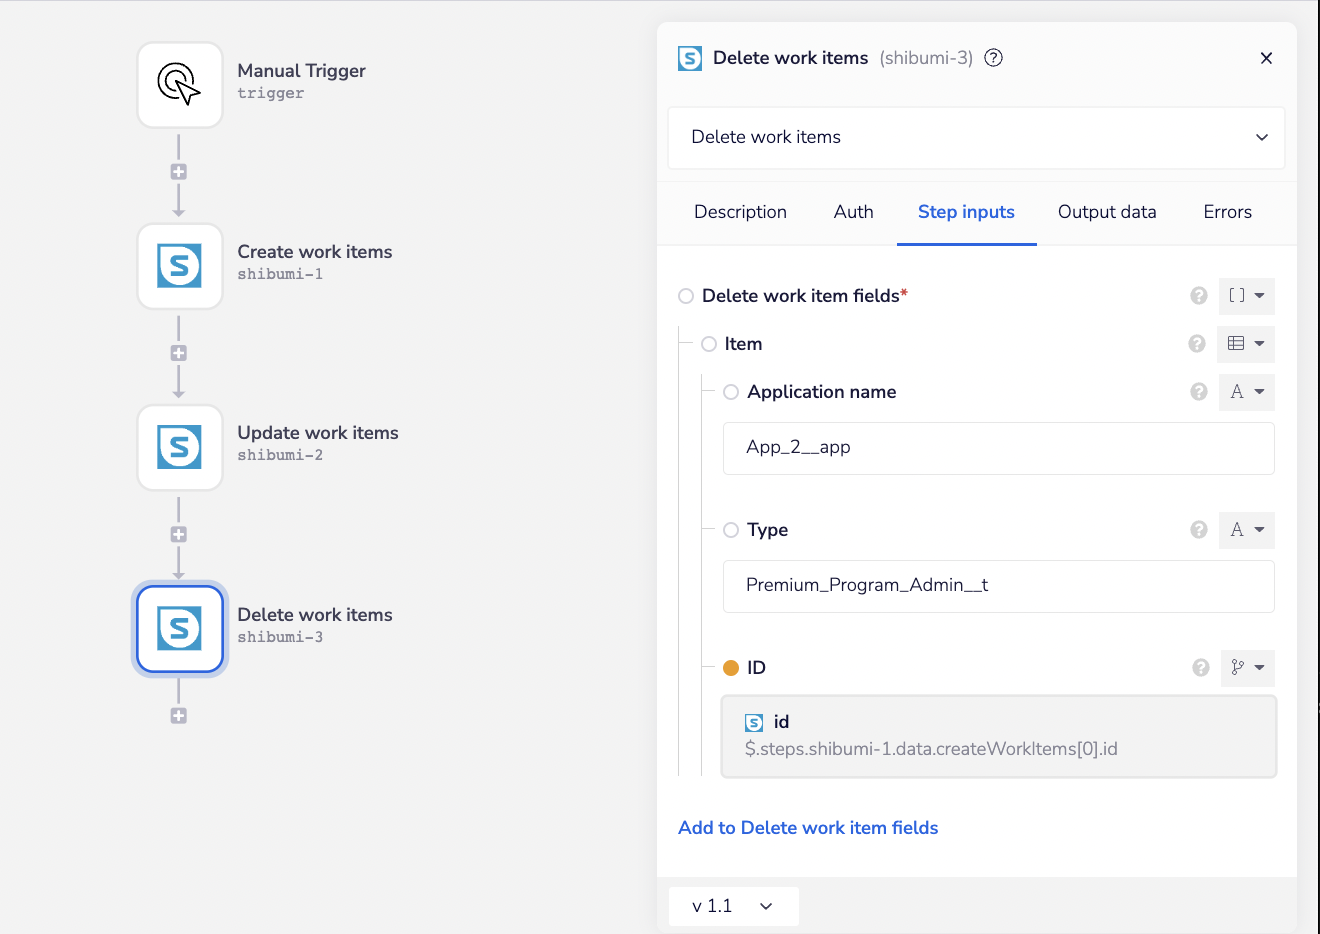 When run, this operation deletes work items in your Shibumi account.
**BEST PRACTICES: **Whenever you do decide to create your own workflow, be sure to check out some of our key articles such as: