Create connector
Export your OView penAPI spec and auto-create a connector using the Tray CDK
Once you have successfully built an API, it is possible to download the OpenAPI spec and then use the Tray CDK to build a connector which can be deployed and shared with your organization. The steps involved are outlined below:
1 - Download OpenAPI spec
The first step is to go to the 'Operations' section of your project and click 'Download OpenAPI specification':
 This should be saved to your local machine, in the directory where you manage your CDK projects.
2 - Create new CDK project
First make sure that you have created a namespace, installed Node, Typescript and the Tray CDK CLI as detailed in the CDK Introduction
Then as per Import OpenAPI specification you can run:
tray-cdk connector import [OPENAPI_SPEC] [CONNECTOR_NAME]
For example:
tray-cdk connector import text-classification__openapi.json text-classification
Note that this command must be run in the directory where you keep your CDK projects, and the OpenAPI spec must be kept in that folder.
This will then create a new CDK project in your specified directory
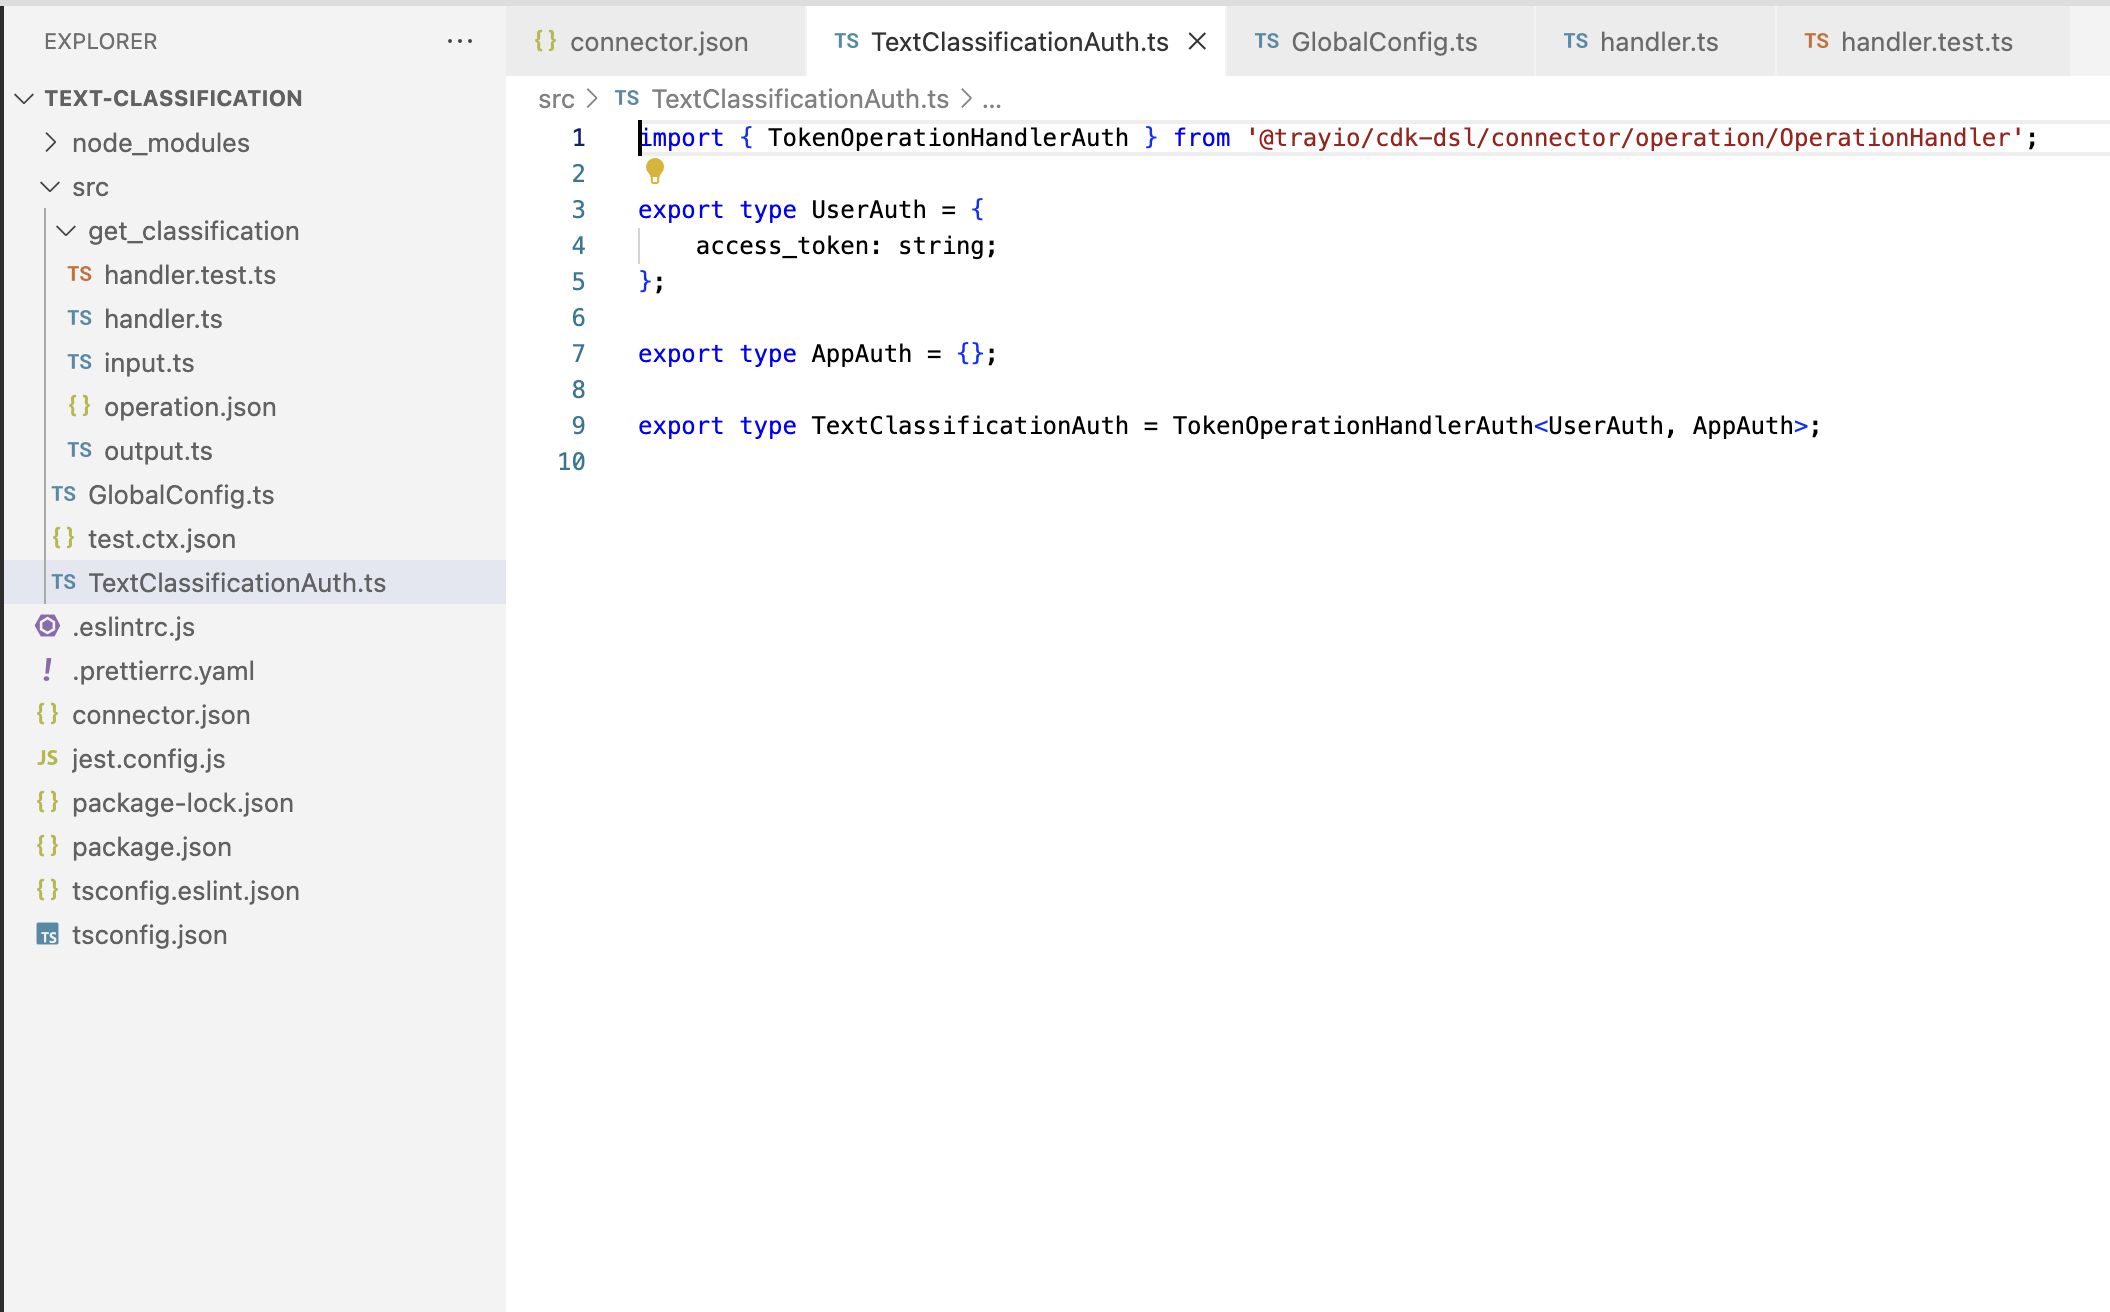
3 - Edit the auth.ts file
You will find that the <ConnectorName>Auth.ts file is not yet configured, so you will need to edit this to include a simple token user auth:
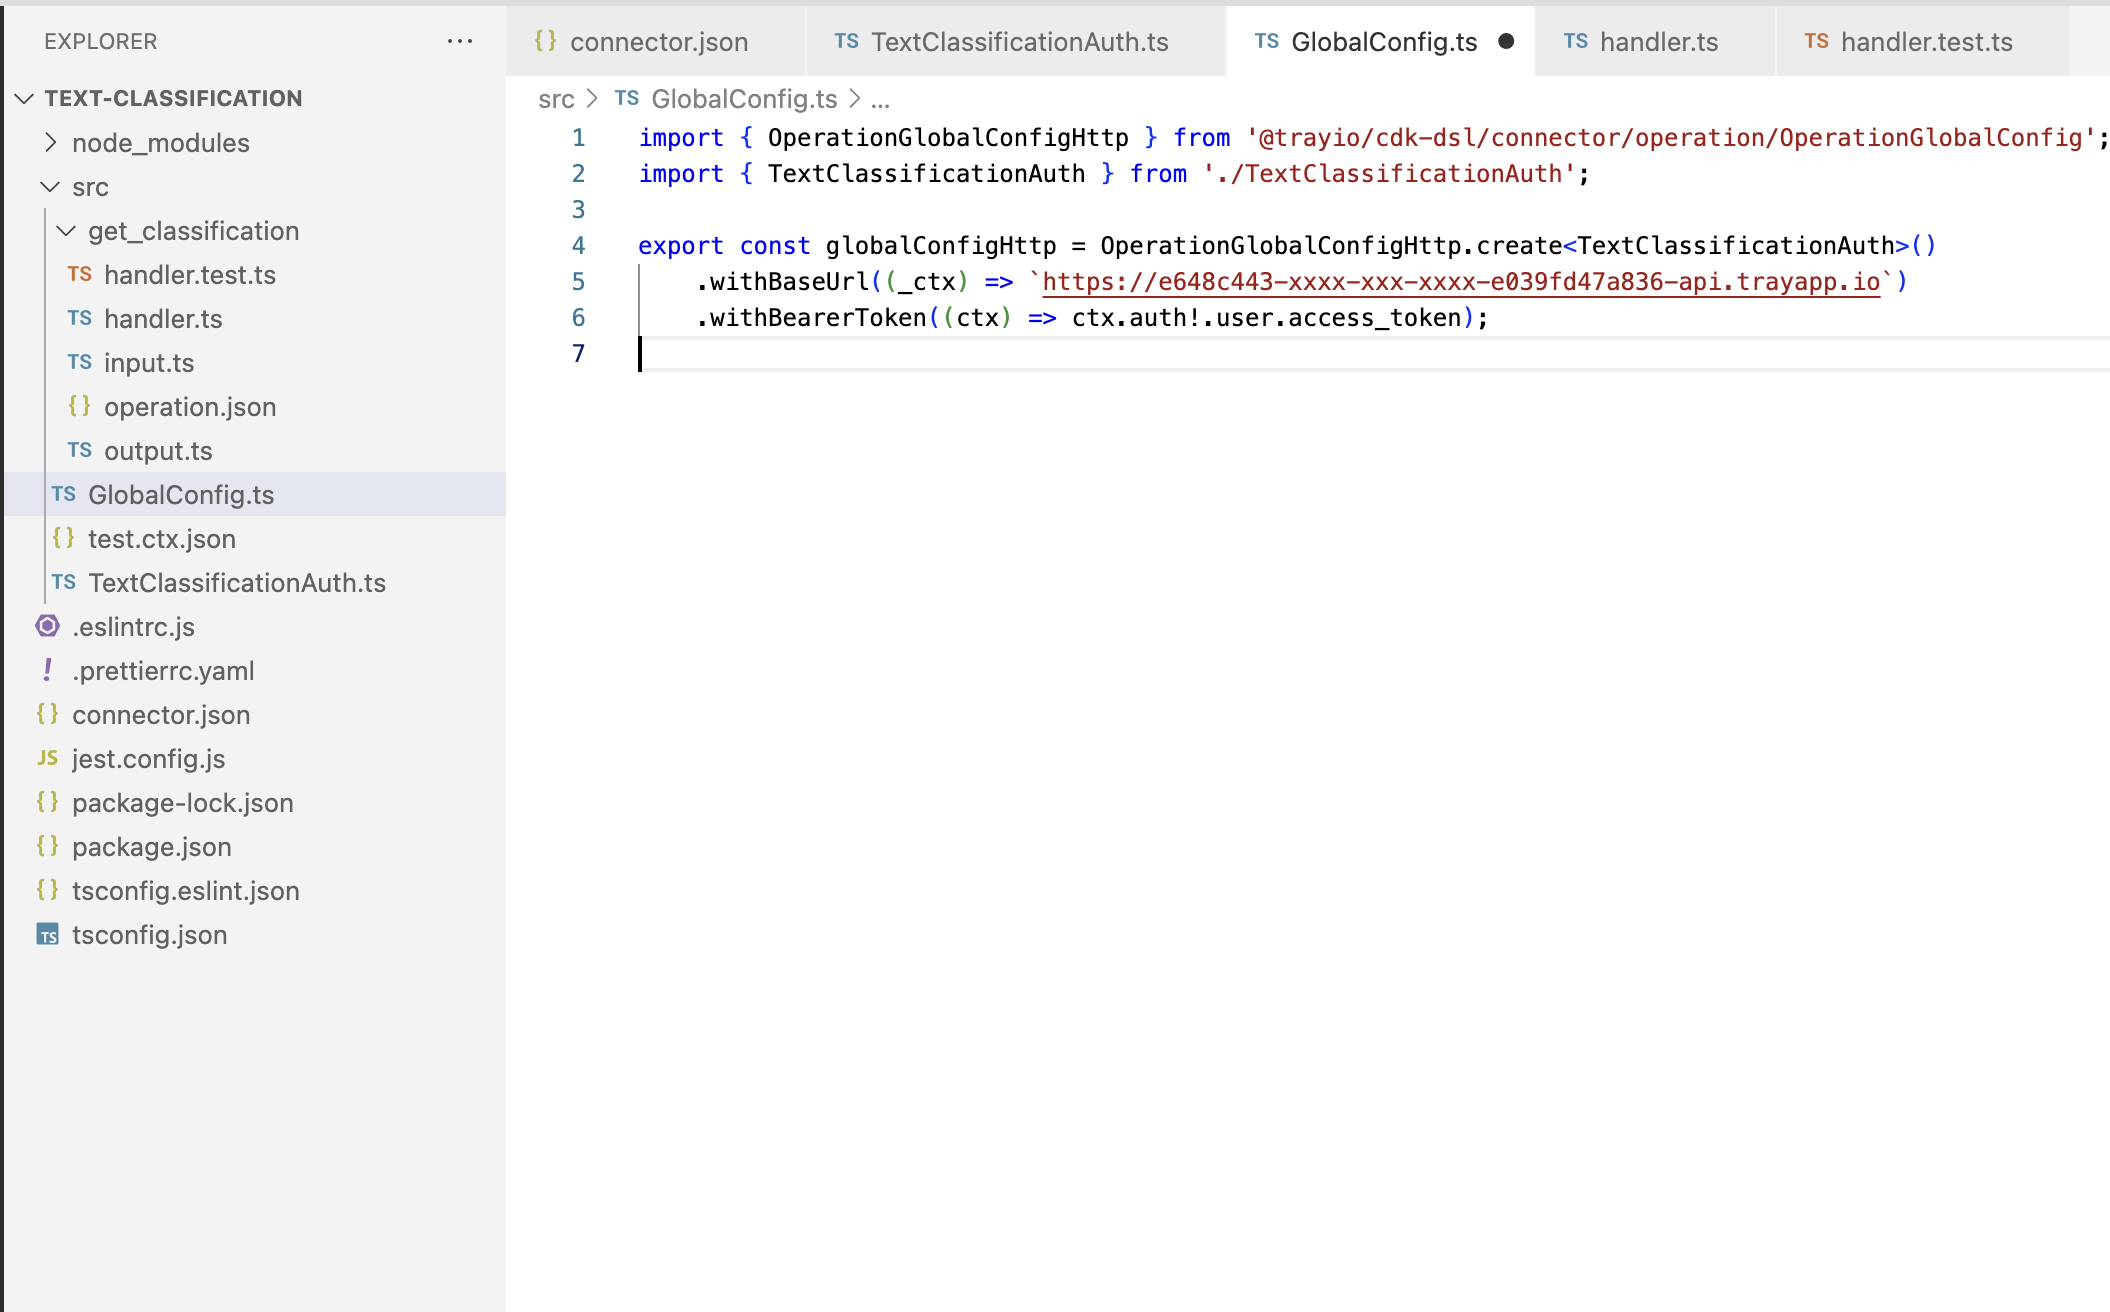
4 - Edit the GlobalConfig.ts file
In Global config add the base url of your APIm project, and the necessary config for using a bearer token:
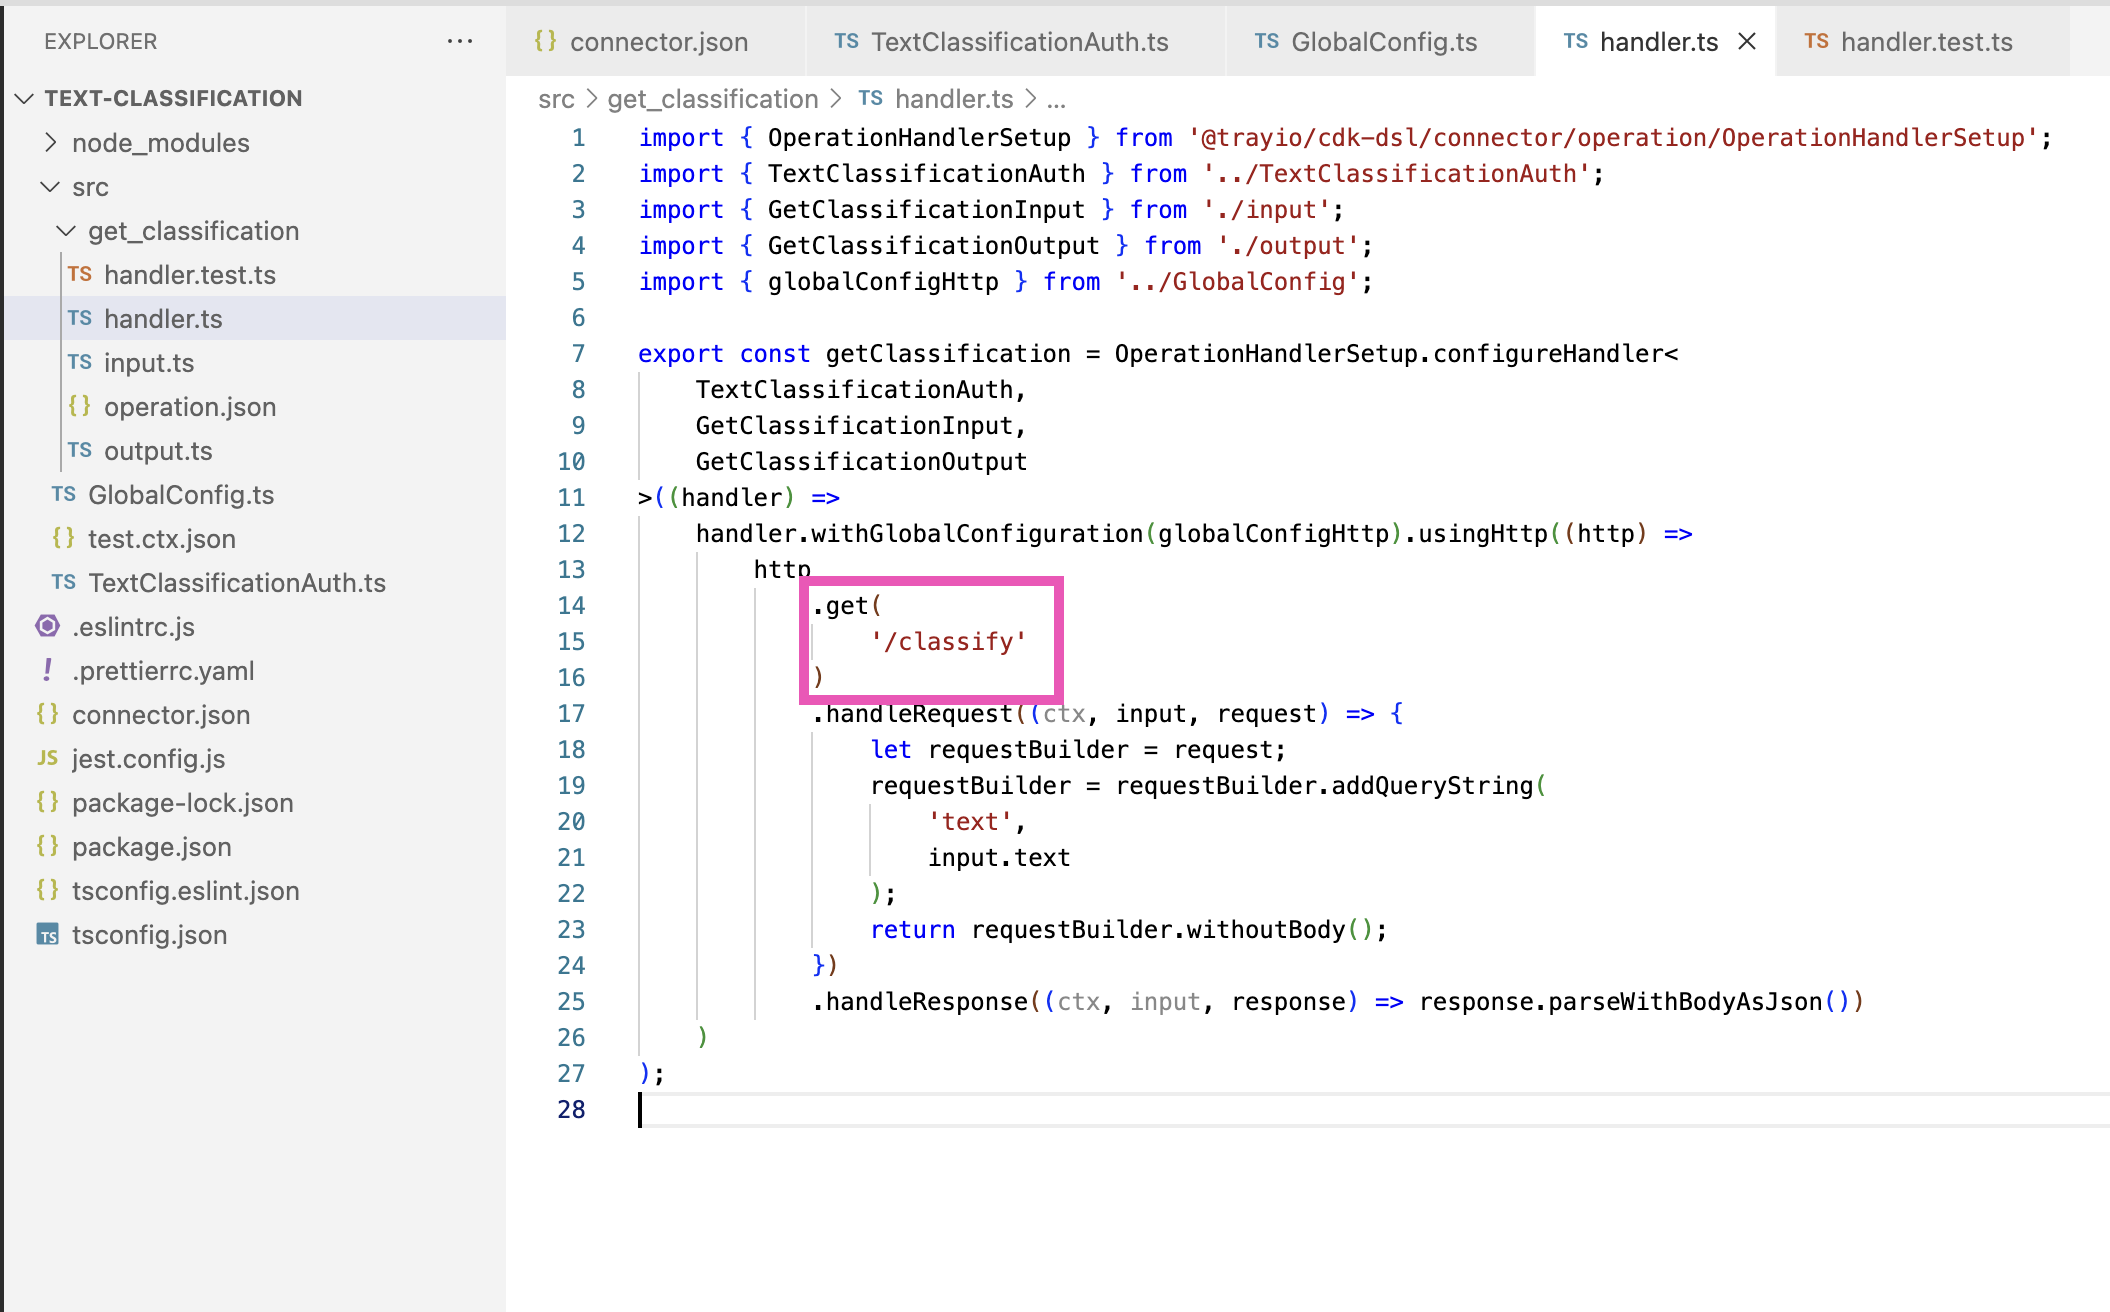
5 - Edit handler.ts for each operation
Make sure that the correct endpoint is appended on to the base url in each handler.ts file:
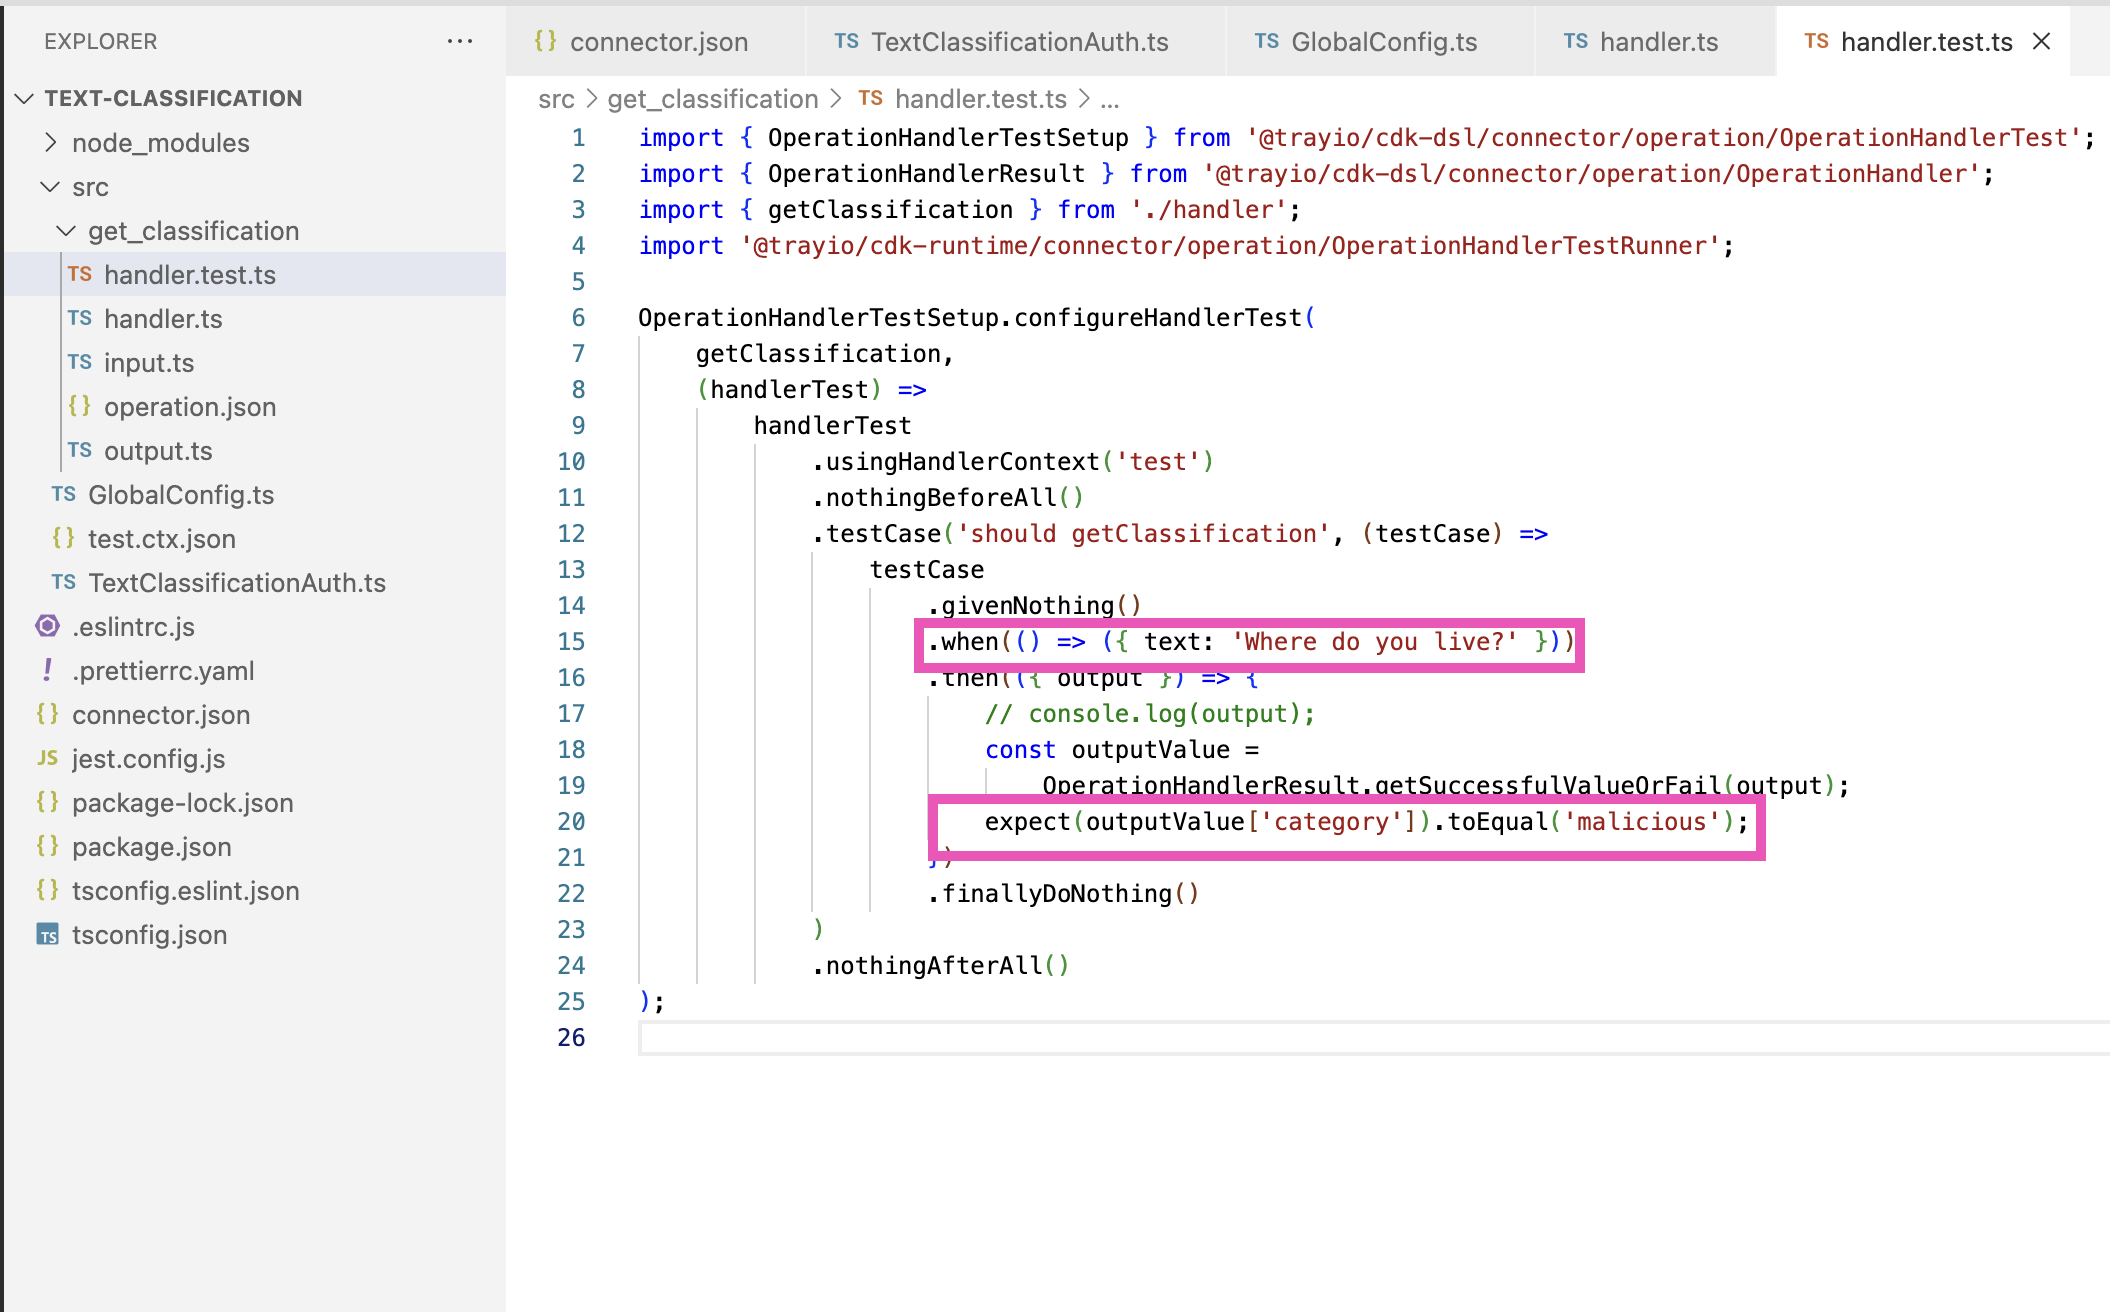
6 - Edit handler.test.ts for each operation
In each handler.test.js file make sure that there is meaningful data being passed in which will return predictable results that you can specify as expected in the return payload:
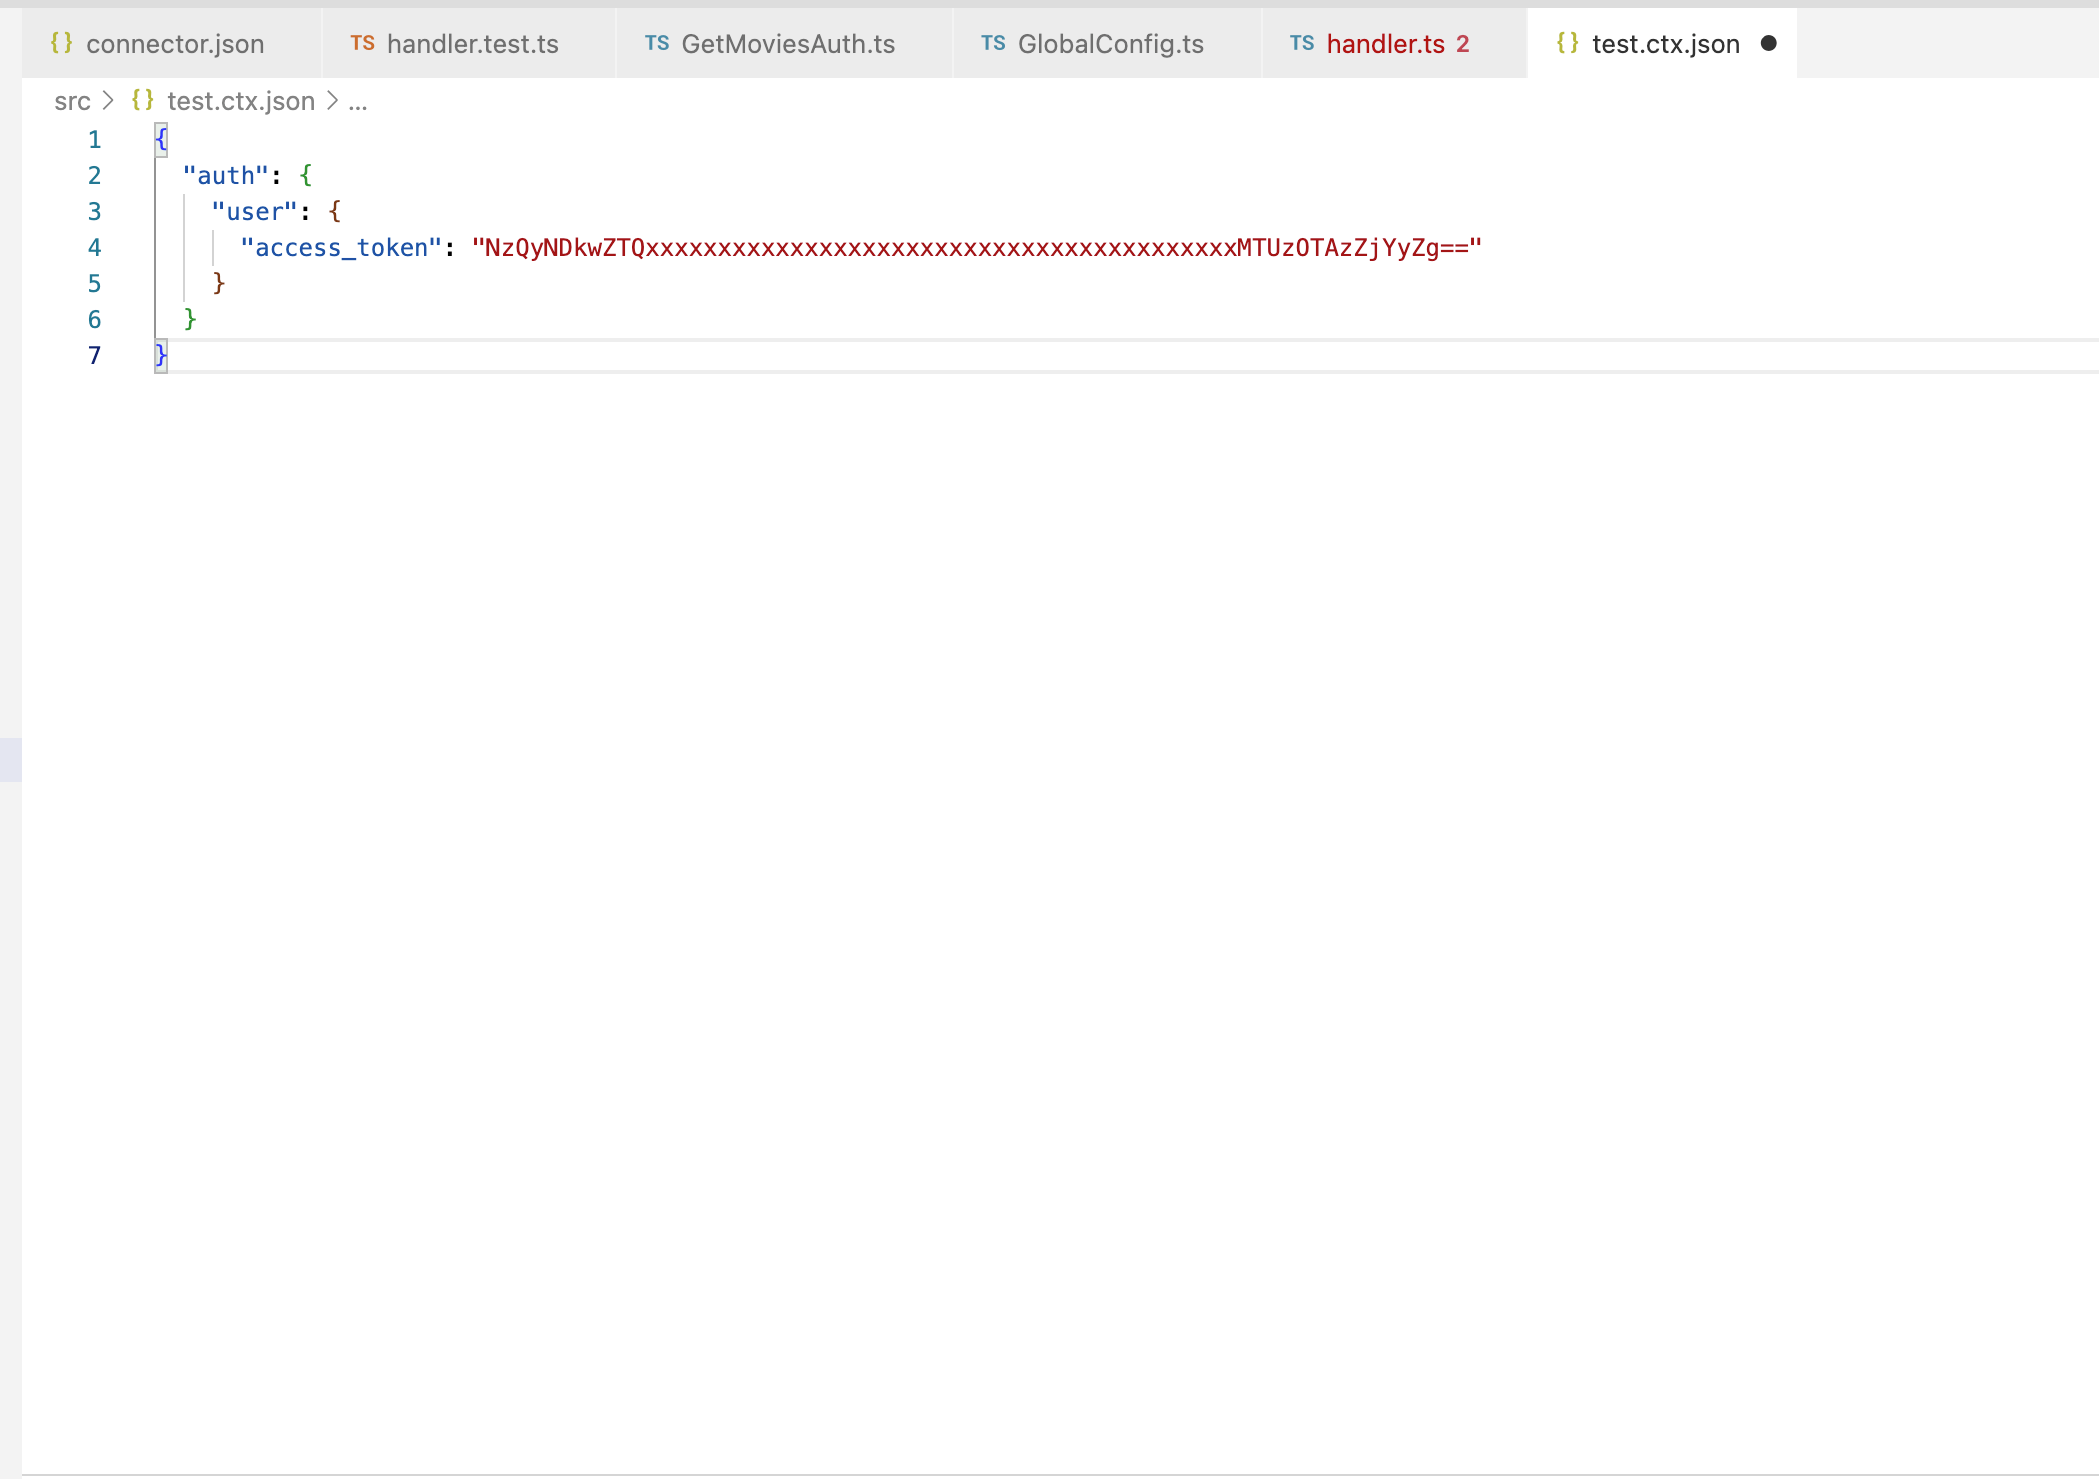
7 - Add APIm token to test.ctx.json
Finally, add a token (generated in the APIm project access control section) to the test.ctx.json file:
8 - Run tests
Now run npm run test in your project folder.
All tests should complete successfully.
If you experience a timeout error you can add jest.setTimeout(30000); to each handler.test.ts file
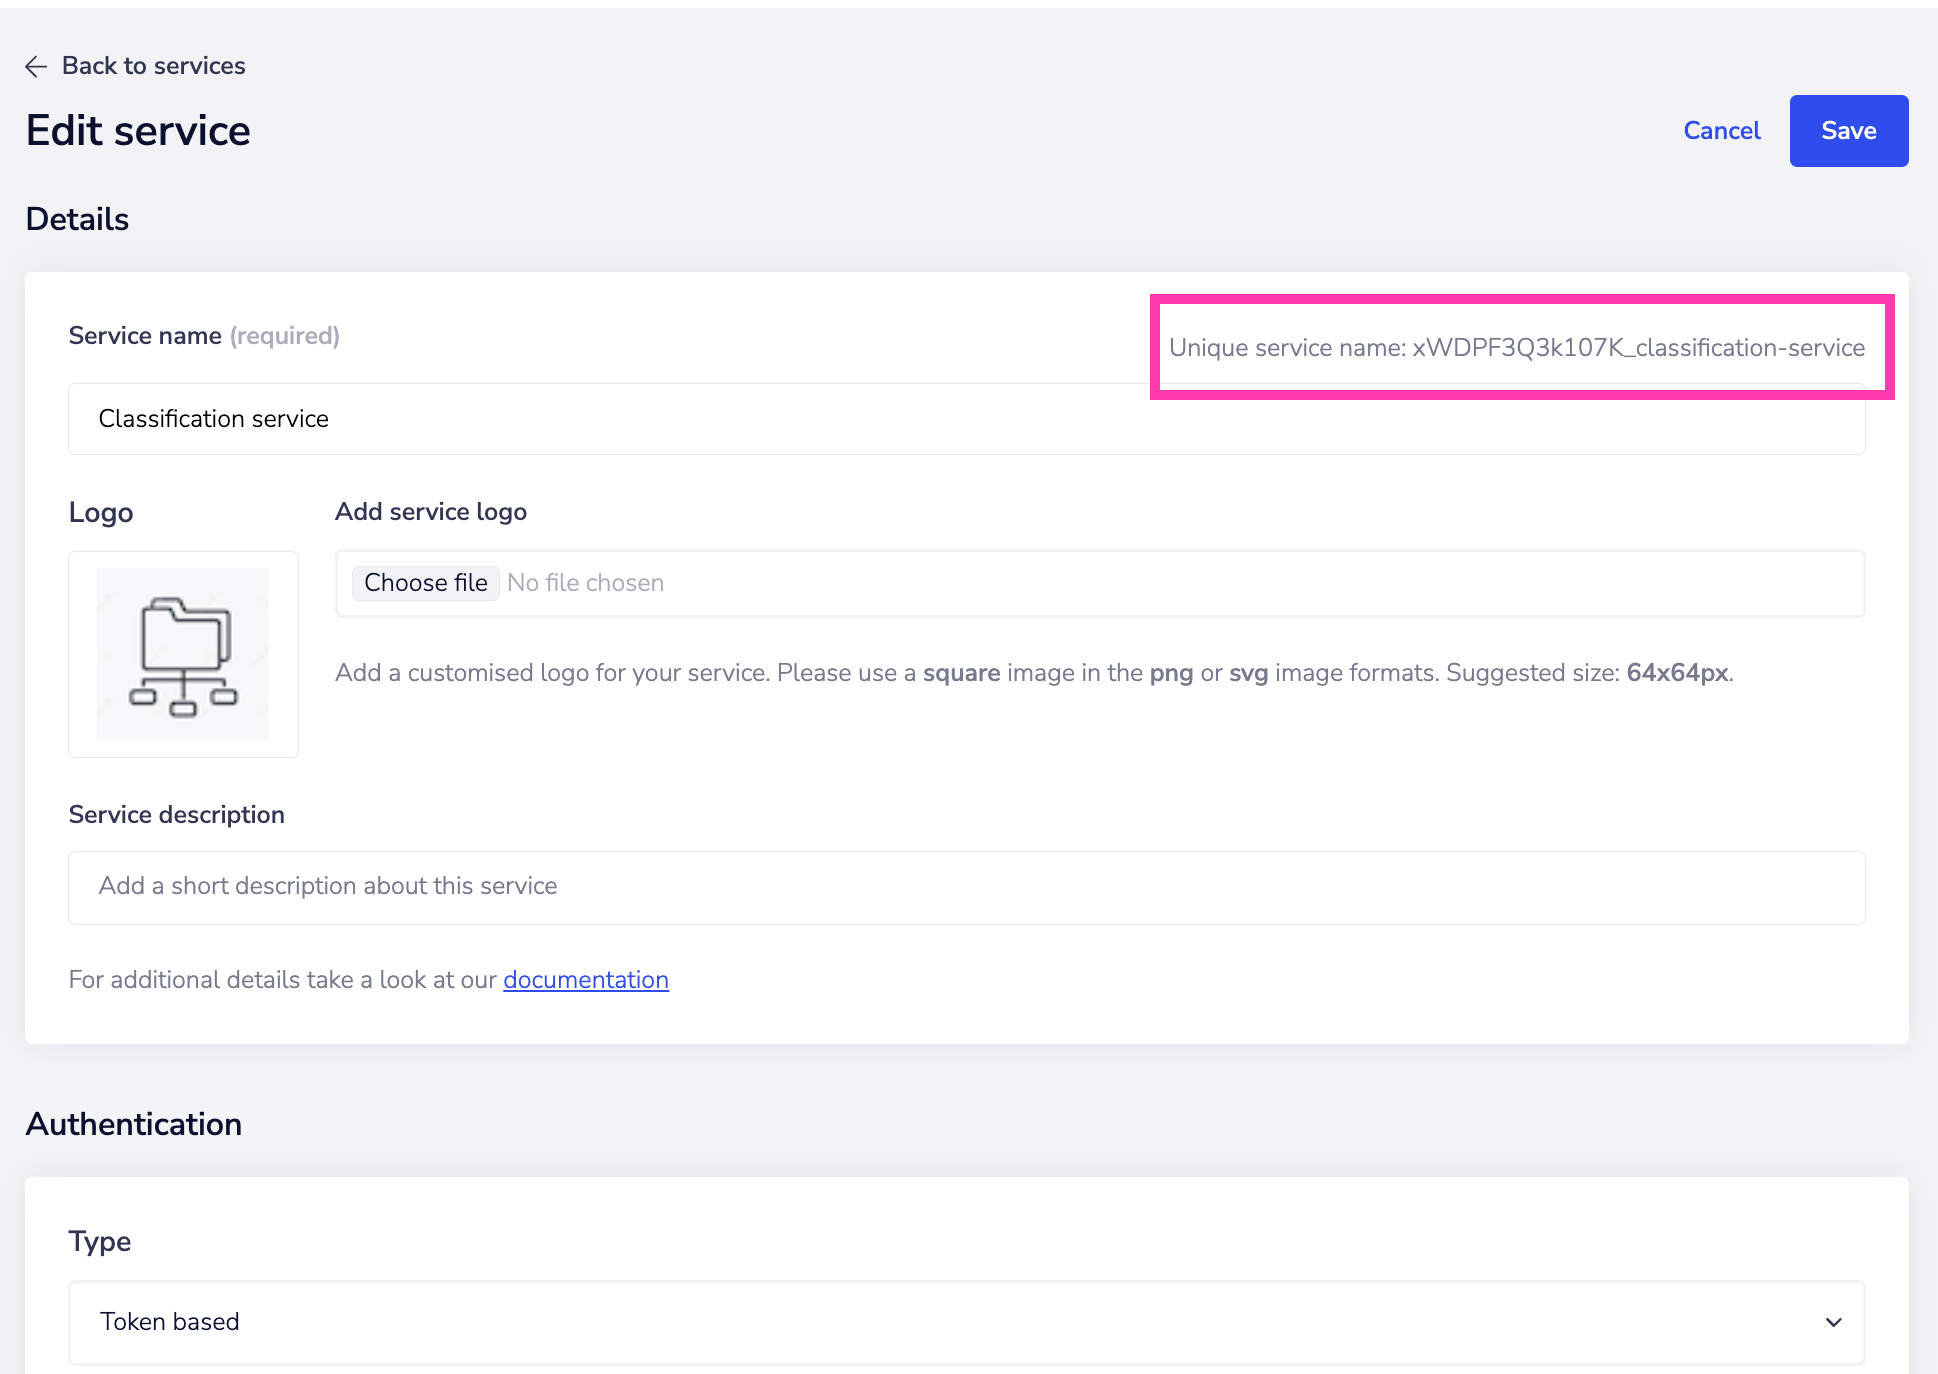
9 - Create a custom service
You will need to create a custom service for creating authentications for the connector. On saving the service you can copy the Unique service name:
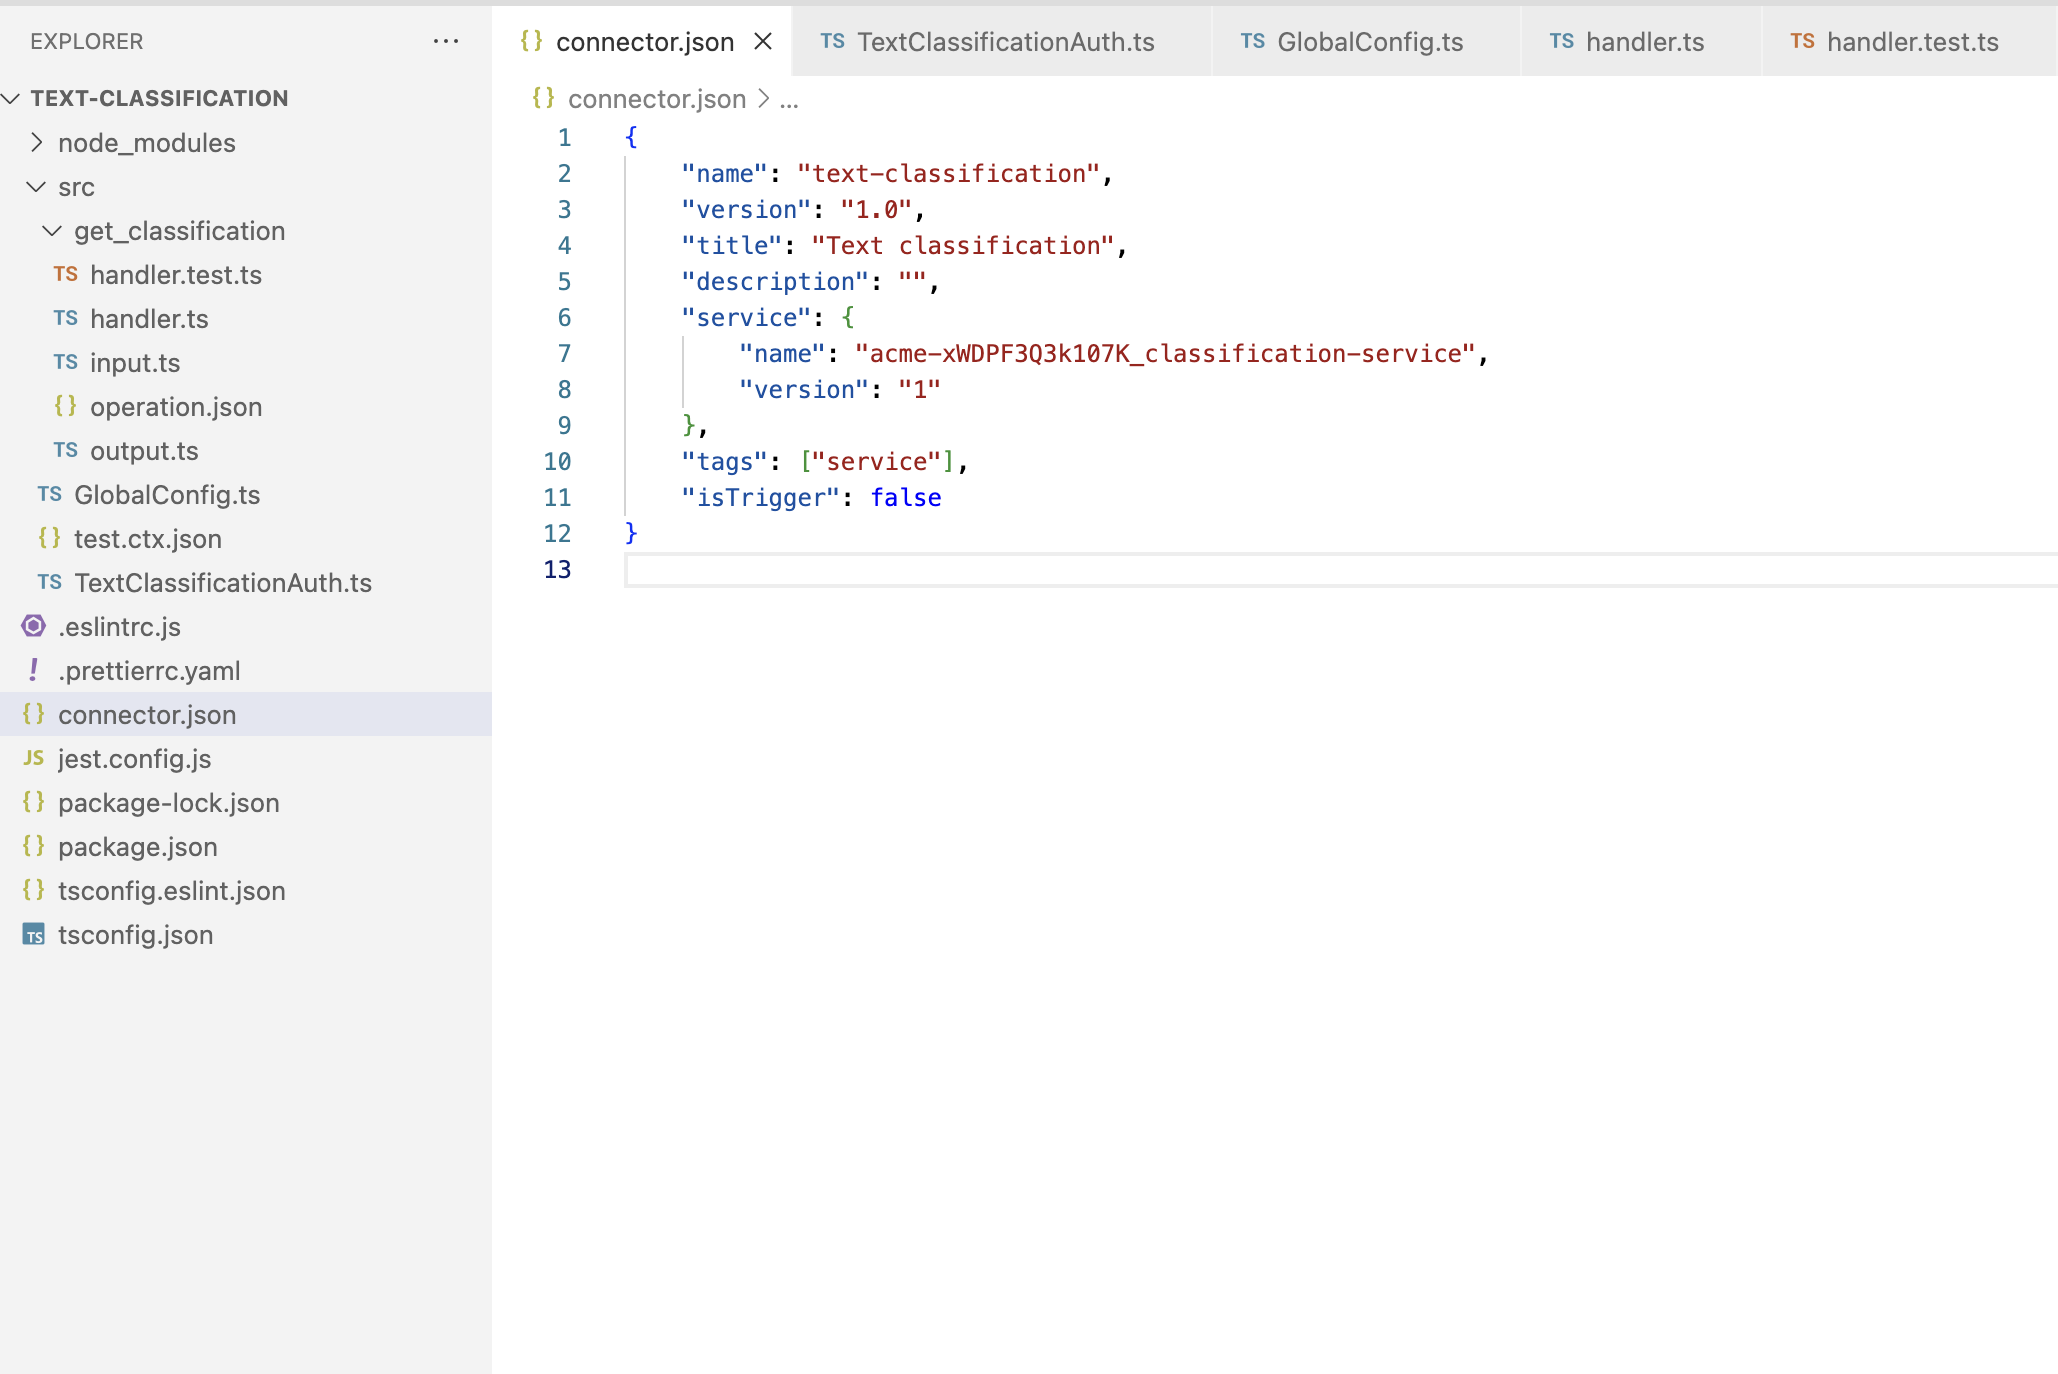
 Open the connector.json file in your CDK project and enter the Unique service name as the name of the service, with your namespace as a prefix
10 - Create an API token
You will need to create an API token as detailed in Creating API tokens
11 - Deploy the connector
To deploy the connector run the following commands in your project directory:
export TRAY_API_URL=https://api.tray.io
export TRAY_API_TOKEN=<API_TOKEN>
tray-cdk deployment create
Tests will complete, and the connector should be available within the Tray app in a few minutes.
12 - Share the connector
The connector must be shared with your user account before you can use it. This is because the connector was deployed using the token issued against an API user who is not connected to your Tray user account in any way.
You can share the connector with your Tray user account by:
tray-cdk permissions add [CONNECTOR_NAME] [CONNECTOR_VERSION] --email="[YOUR_TRAY_ACCOUNT_EMAIL_ADDRESS]"
e.g. tray-cdk permissions add text-classification 1.0 --email="john.doe@domain.com"