Auth-only dialog experience
A breakdown of the calls involved with the Auth-only dialog experience
Notes on Auth dialog URL and region
When initiating the Auth dialog for your End Users, you will need to compose the Auth dialog URL as such
https://embedded.tray.io/external/auth/create/{embeddedId}/{solutionInstanceId}/{externalAuthId}?code={authorizationCode}
This URL will vary depending on your region.
If you are in the EU region, the URL would be:
https://embedded.eu1.tray.io/external/auth/create/{embeddedId}/{solutionInstanceId}/{externalAuthId}?code={authorizationCode}
If you are in the APAC region, the URL would be:
https://embedded.ap1.tray.io/external/auth/create/{embeddedId}/{solutionInstanceId}/{externalAuthId}?code={authorizationCode}
Auth-only dialog requires a solution that does not have any config slots. Please hardcode the config values in your solution if you want to test this pathway.
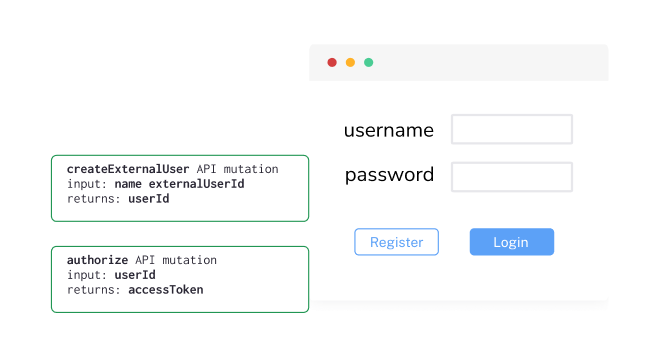
Register a user
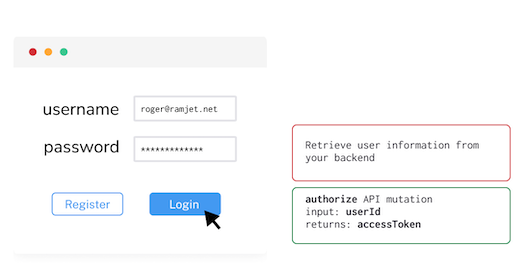
Log existing user in
The best practice here would be to pull the end user information from your own database. You can do it by using the id (email, username etc.) that end users use to log in to your marketplace as their external ID and create a Tray user. Store this External ID that you used in the createExternalUser API call and the returned user ID in your database. This way, you wouldn't have to make this extra graphql query call. We have not followed the best practice in the marketplace app to show how you can achieve this with the API call.
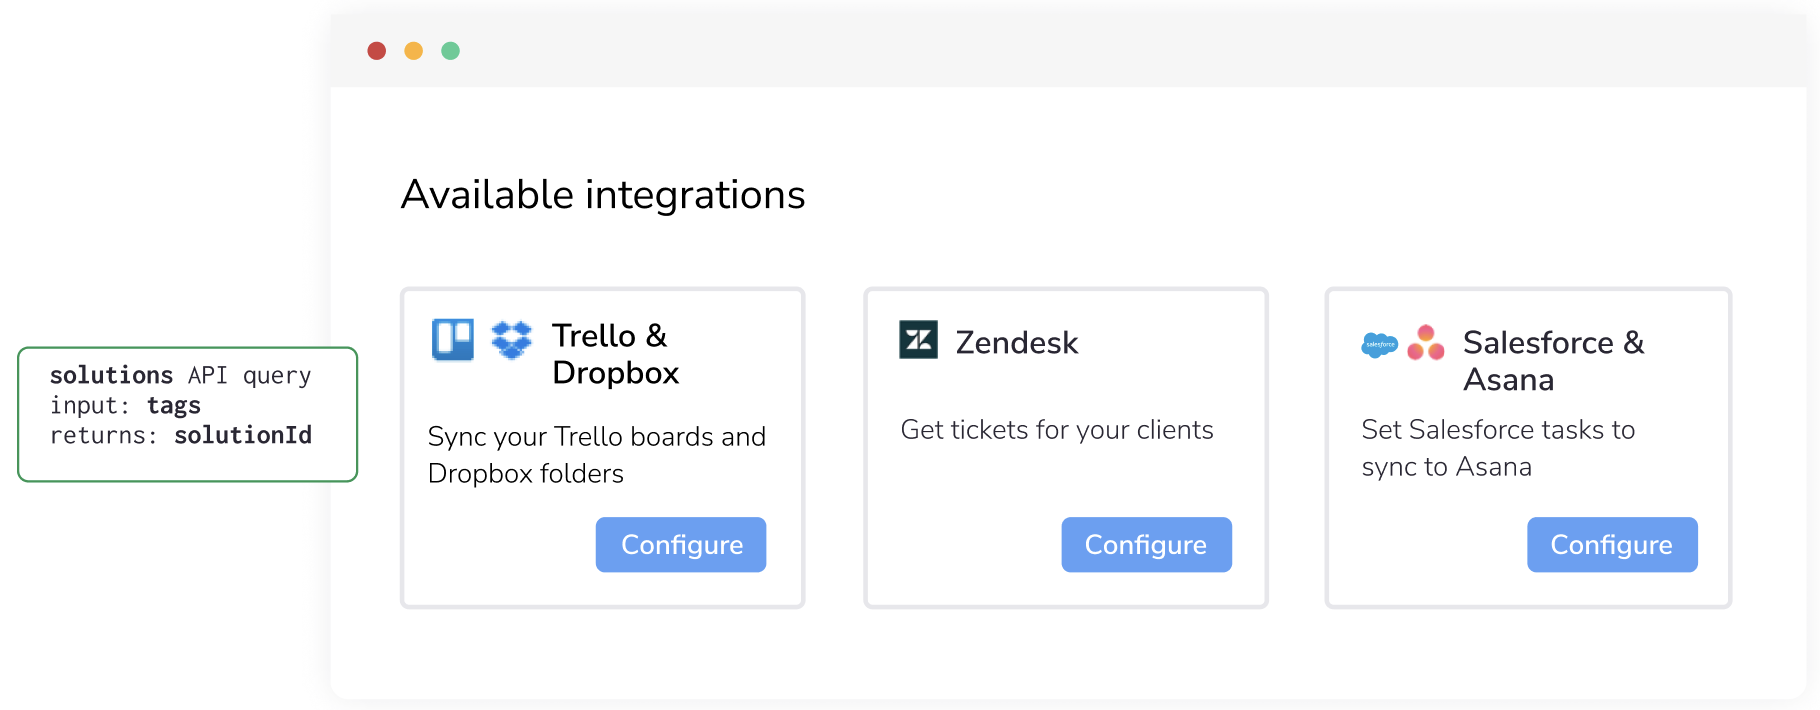
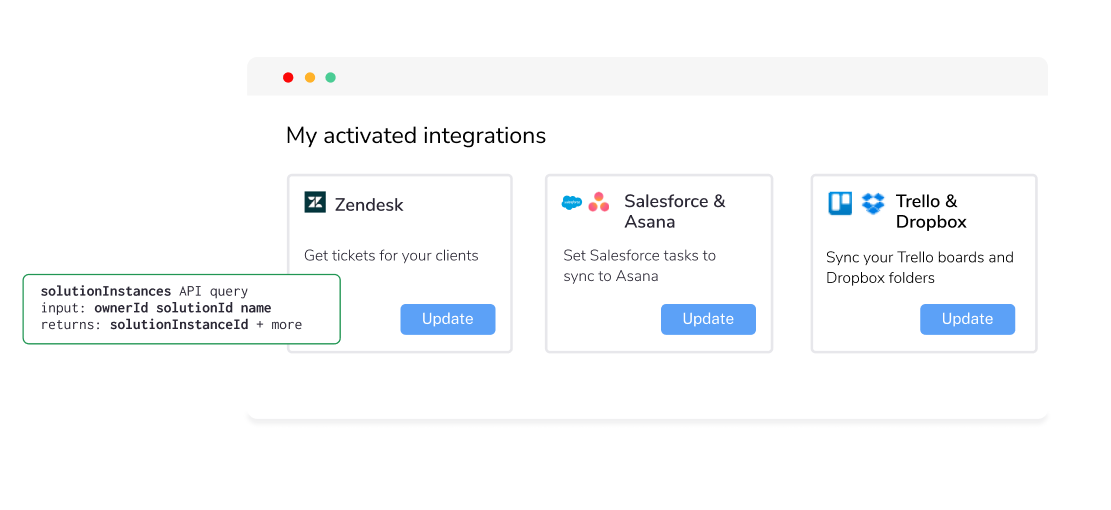
List available integrations
User configures integration
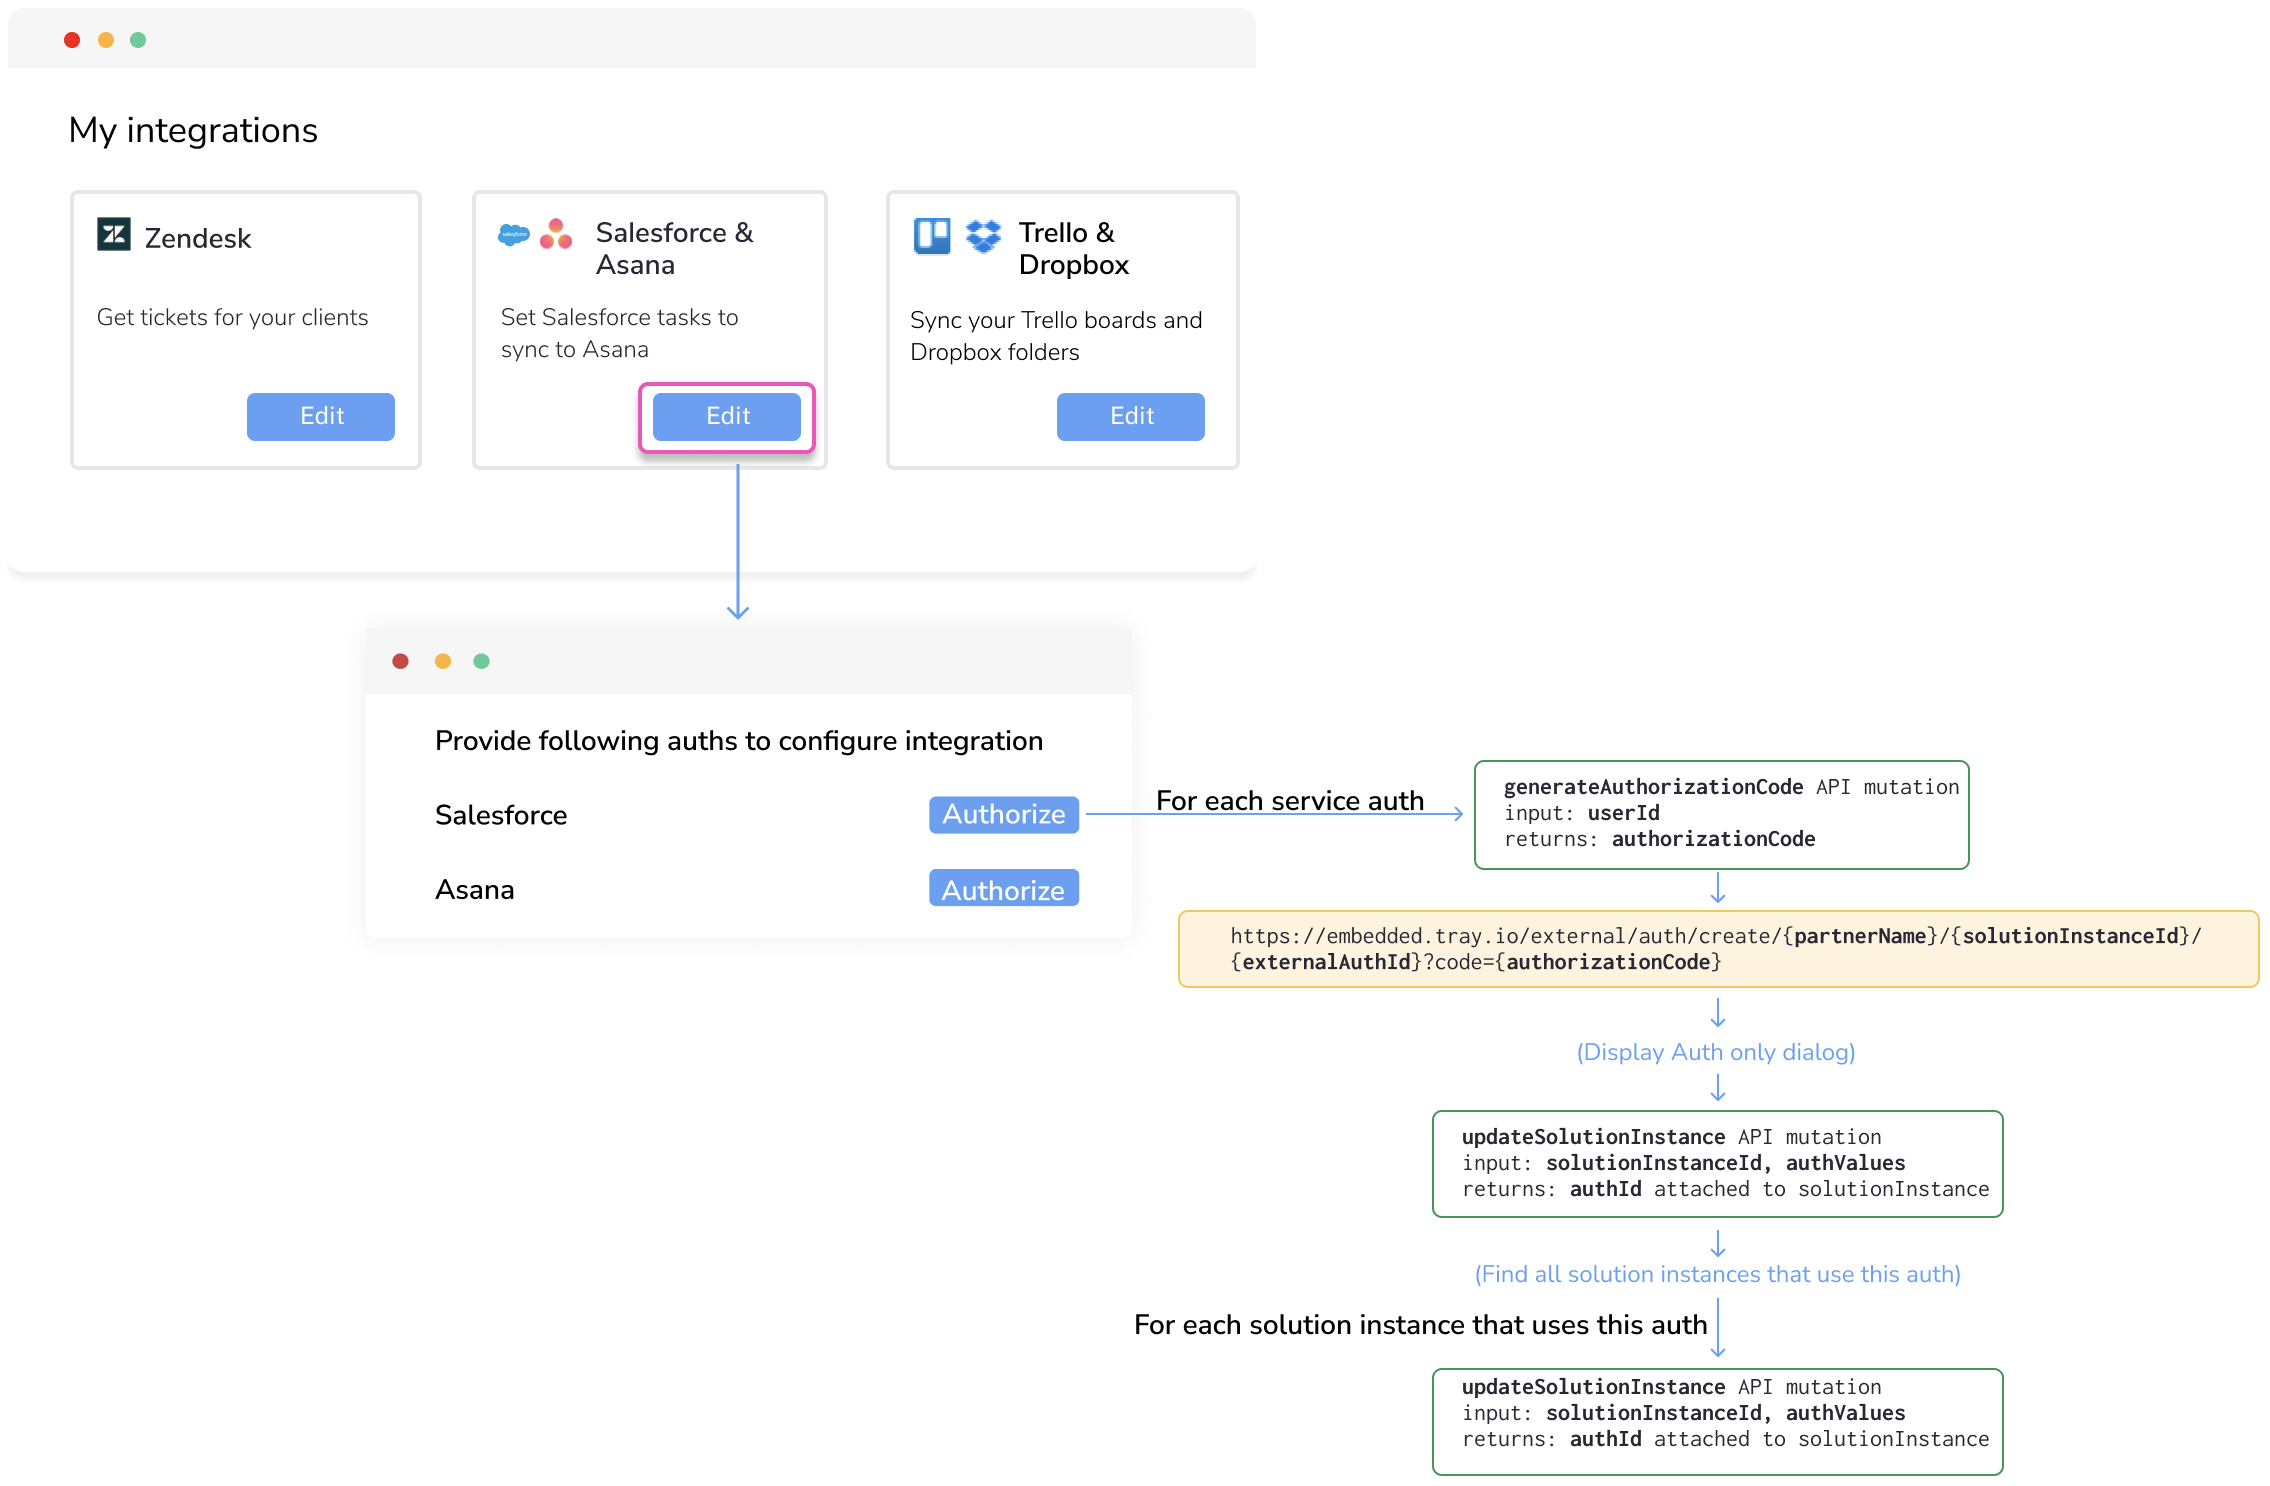
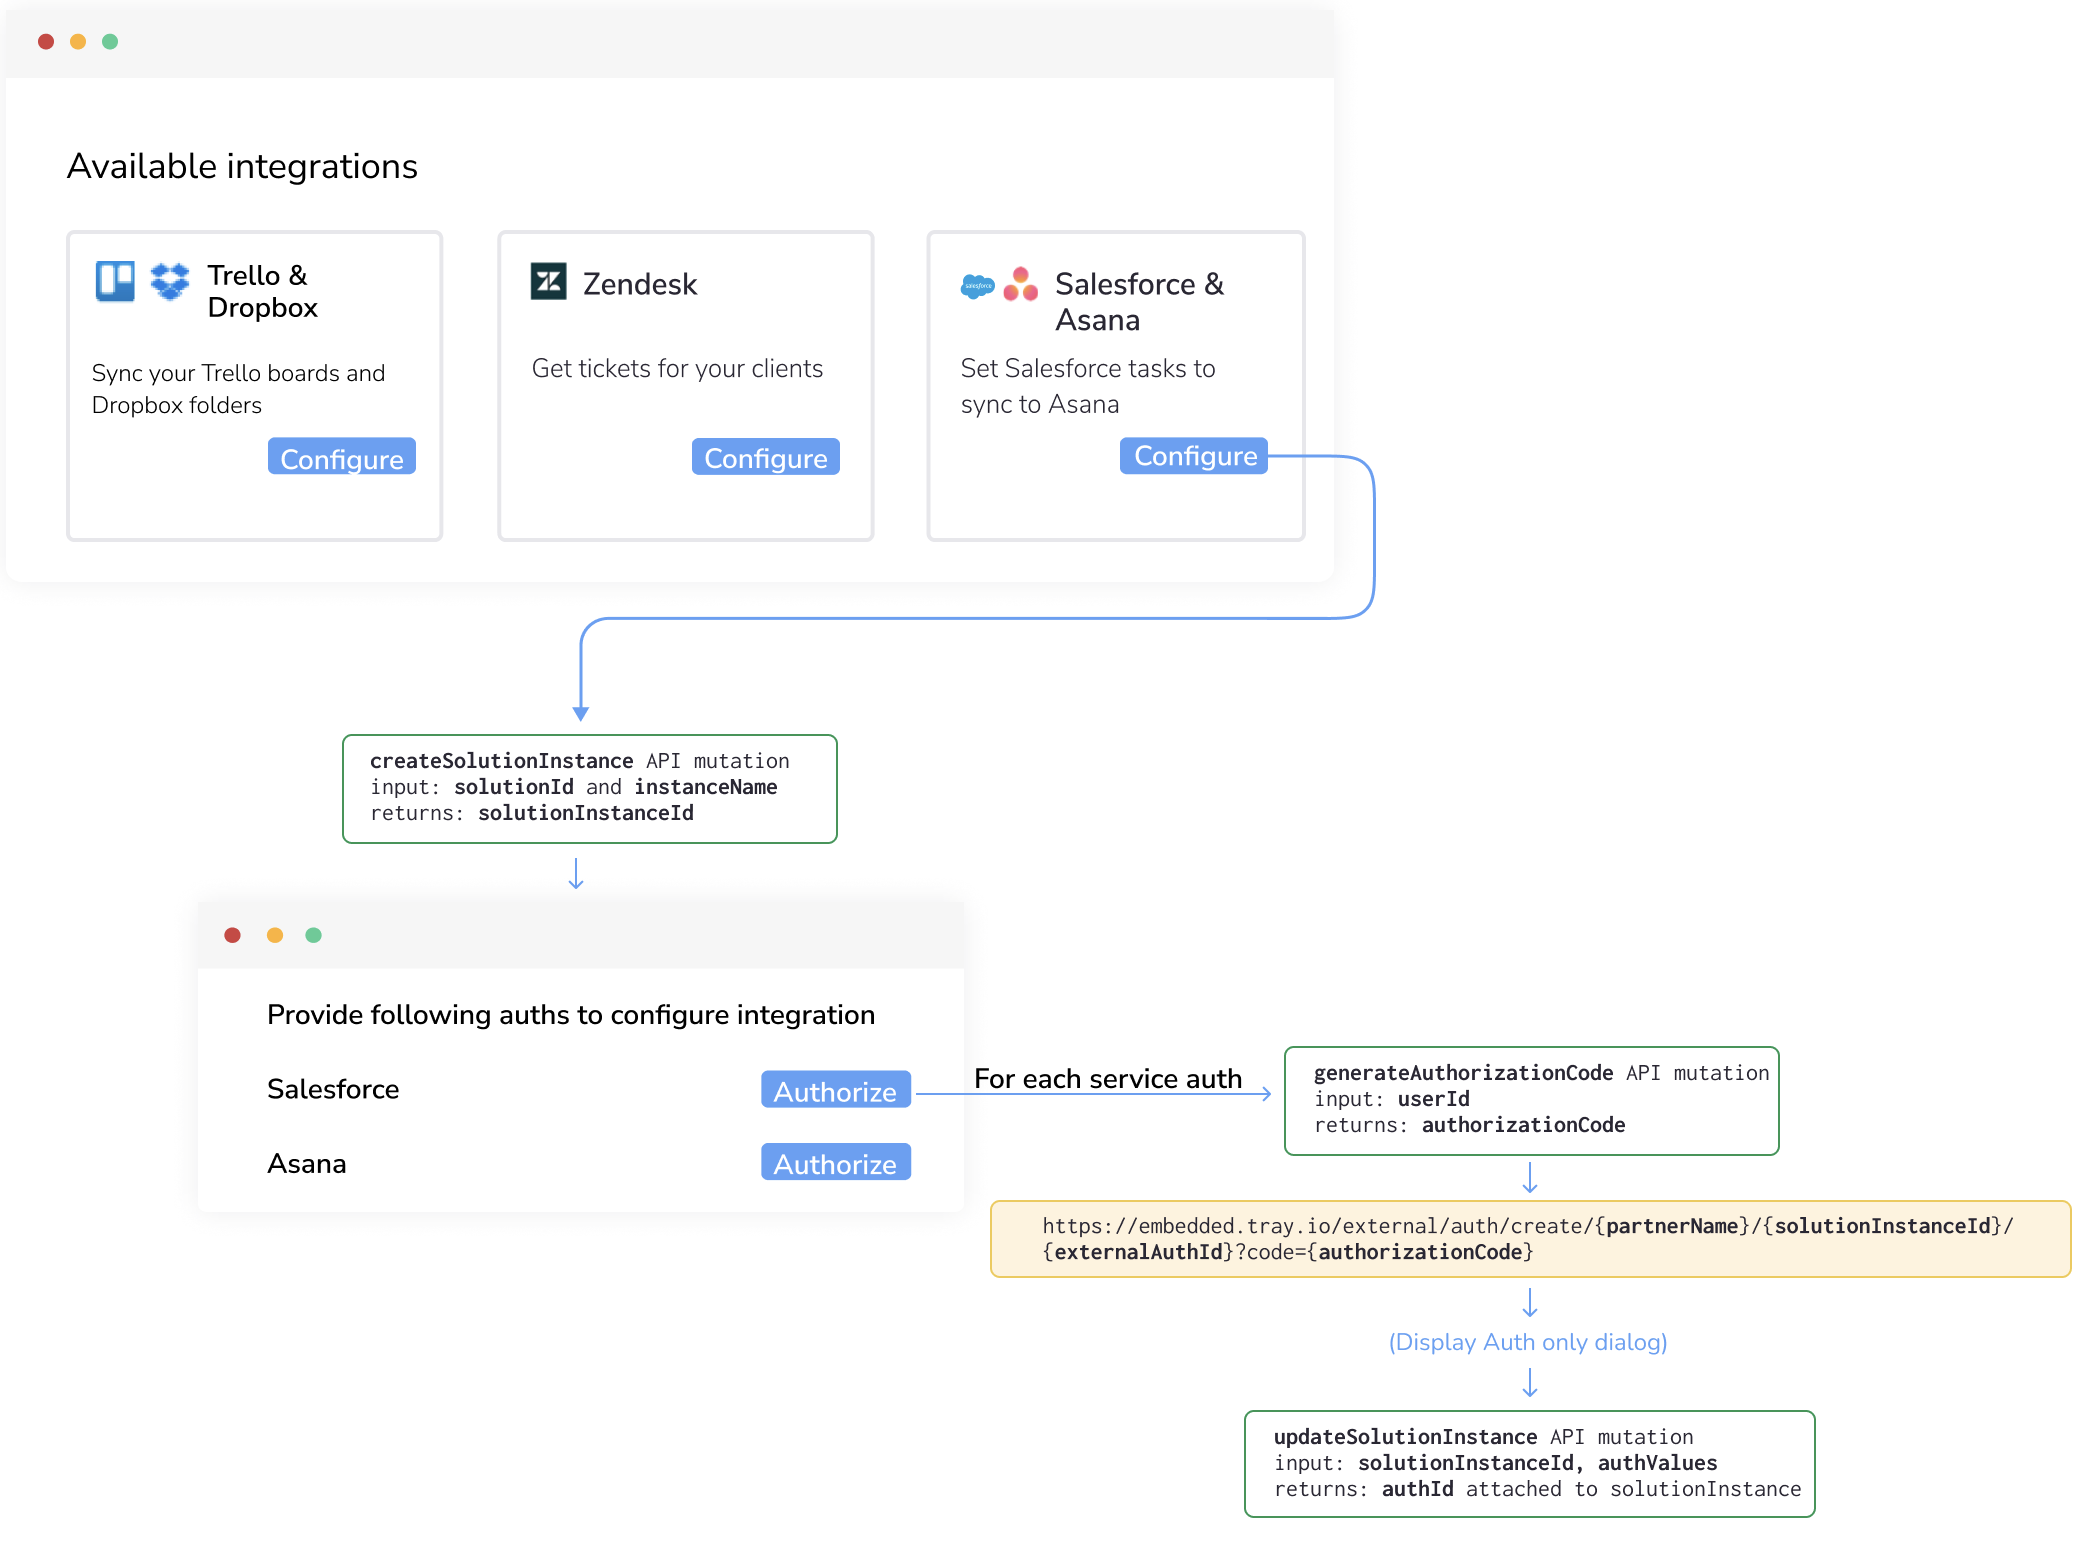 You could have one connect button which creates the solutions instance and one authorize button for each service in the integration as shown above. Follow these steps to present this experience for end users:
Create solution instance
Initialize auth only dialog
Note that these steps would be repeated for each service auth that the end user provides:
You could also attach all auths in one go through a updateSolutionInstance mutation instead of doing one at a time. In that case, you will have to persist the authValues somewhere till the end user has provided auth for all required services.
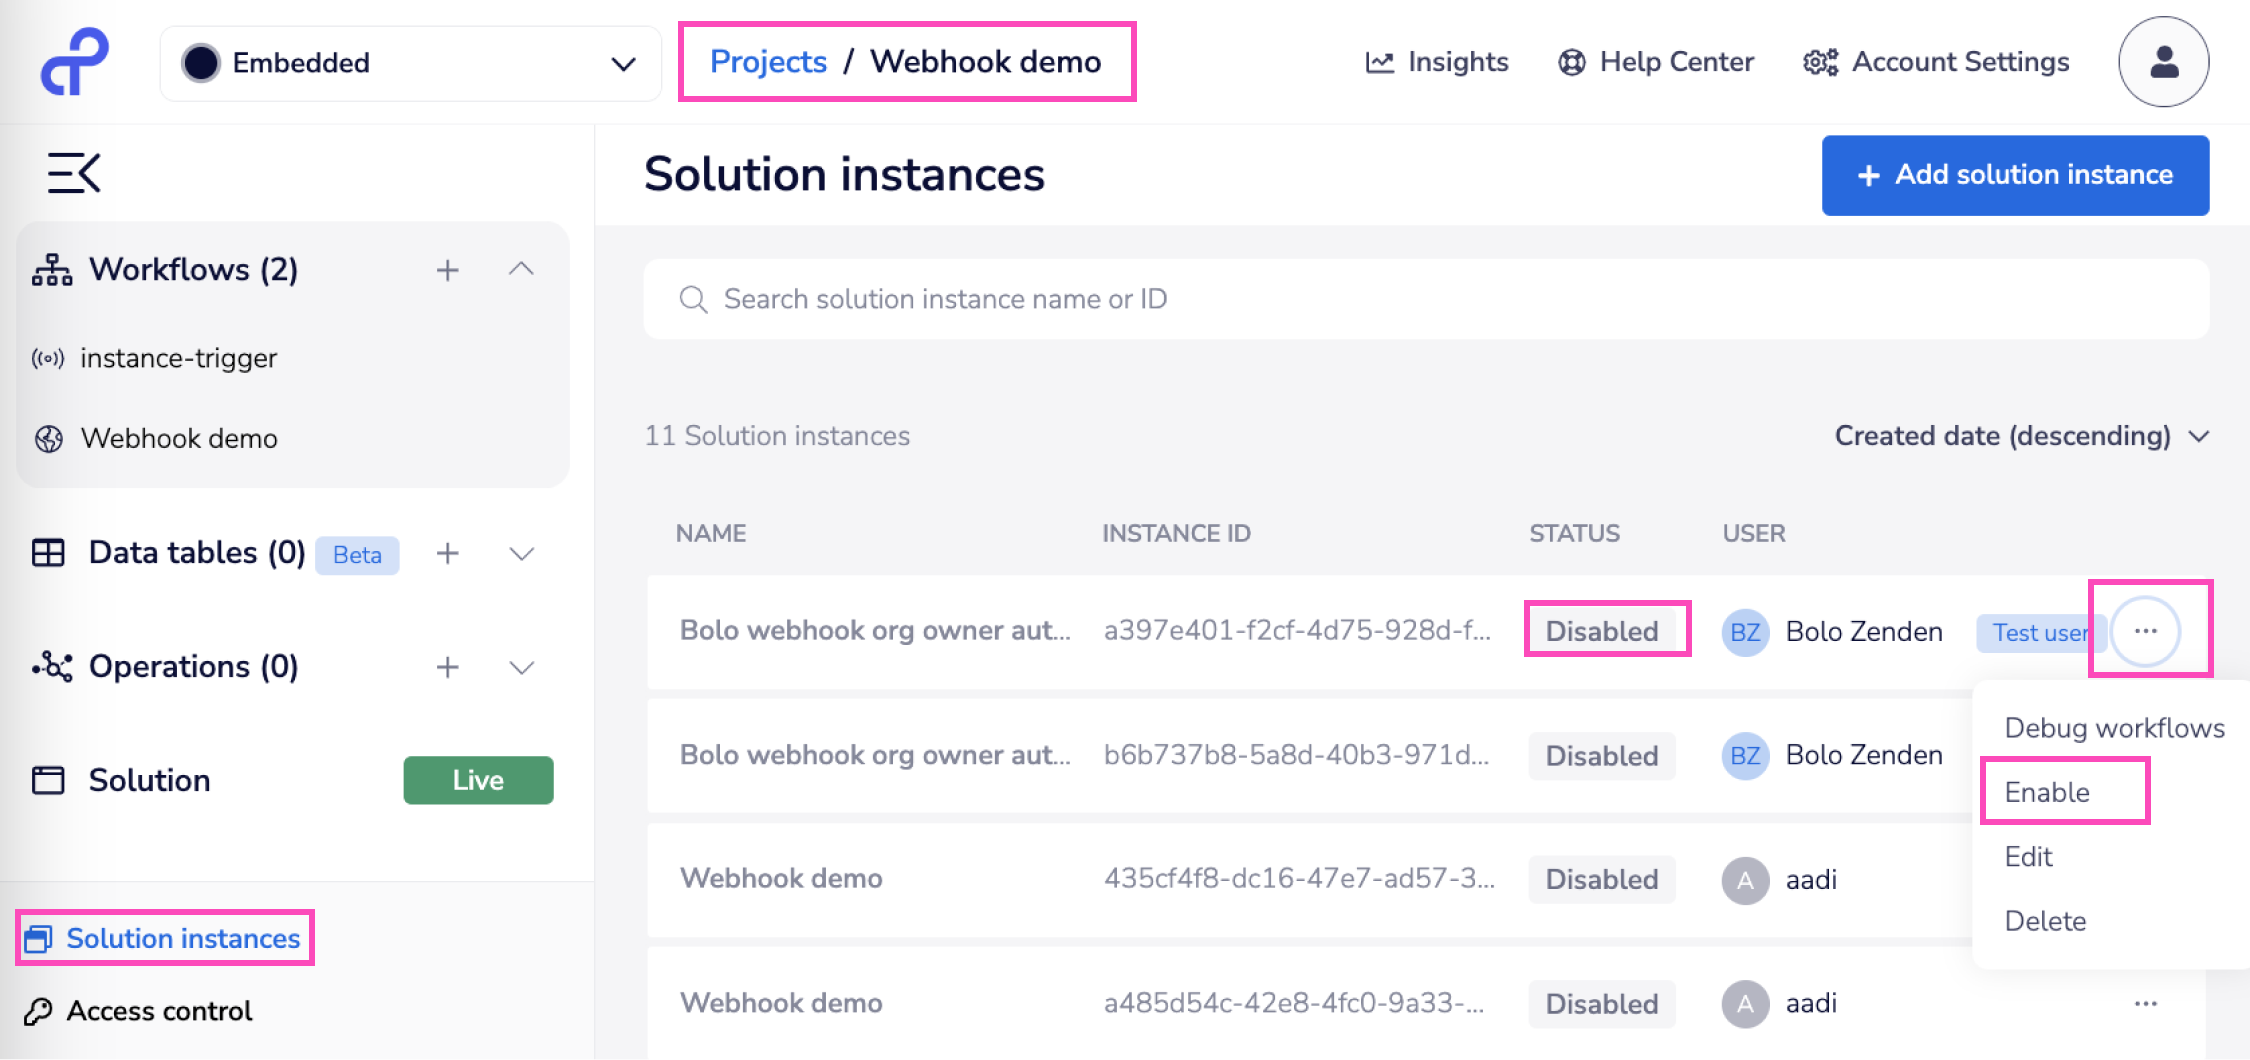
Enable the Solution Instance
Navigate to the relevant Project > Solution instances section. Here, you'll find the Solution Instance for that End User. Currently, it's disabled to allow you to perform any necessary checks or make changes before activating the Instance.
Please not the warning below when enabling instances through the API:
If you are auto-enabling the instances for your end users after they create the solution, your code should be configured to delay this call by at least 2 seconds after Create Solution Instance is complete.
Run and test
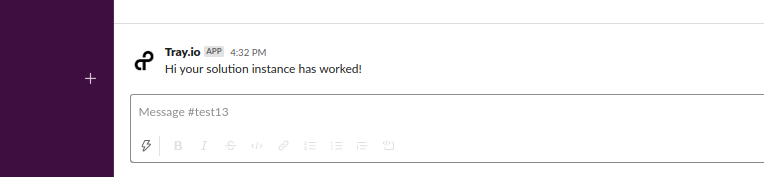
Trigger a run of the Workflow Instance
Now you can paste the triggerUrl into your browser address bar and hit 'enter' to trigger a run of the Workflow Instance.
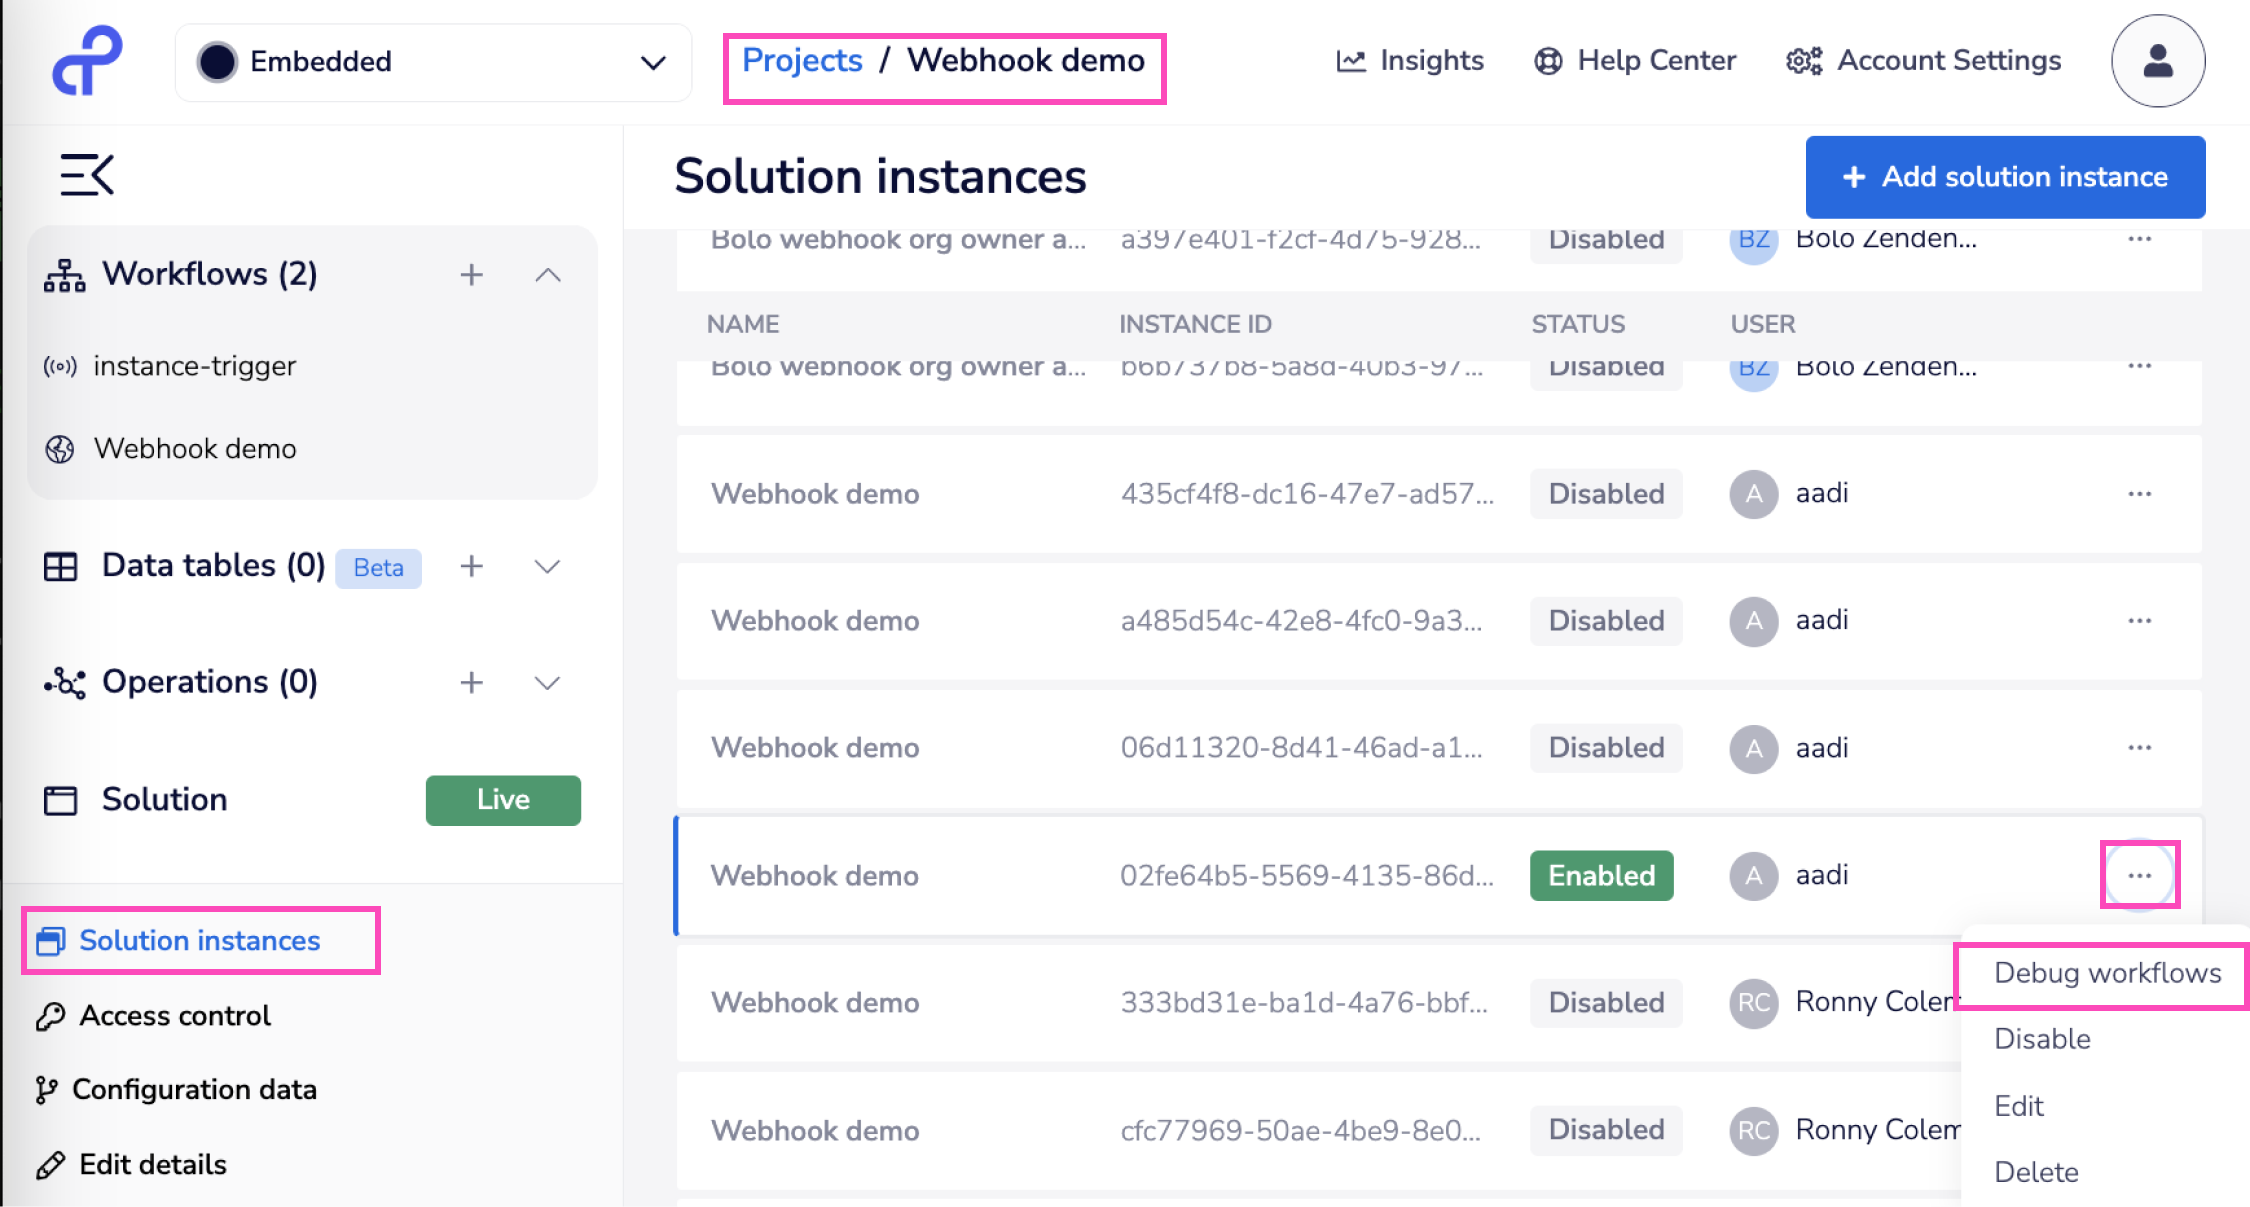
Debugging the Solution Instance
Navigate to the relevant Project > Solution instances you will now see that the Solution Instance is enabled and you can click on 'Debug Workflows' on the solution instance card as shown below:
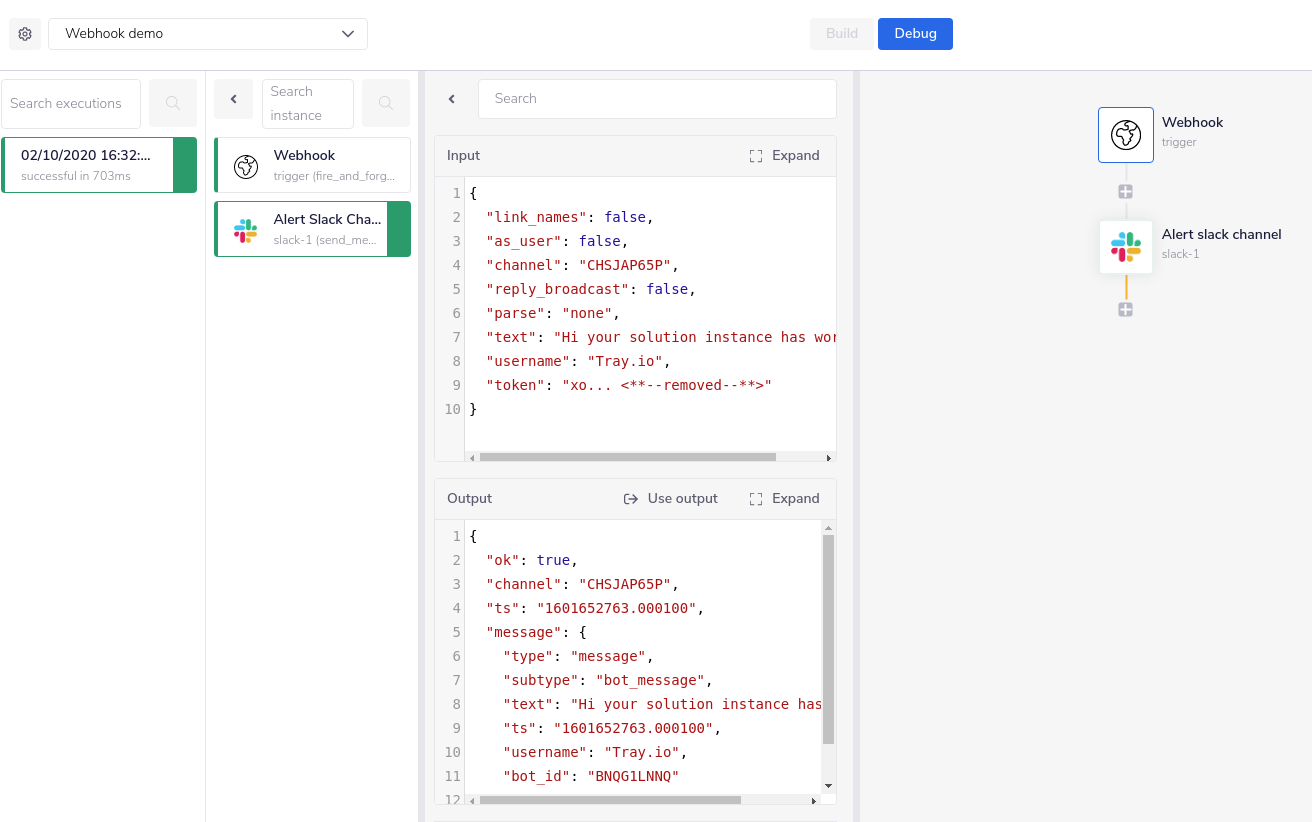
 This will open a modal of all the linked workflows of this solution instance. You can the debug the workflow that you want.
 This will open a read-only version of the Workflow in a new tab:
Please see our documentation on troubleshooting for more on debugging, log streaming and error handling.
List an End User's Solution Instances
User edits integration
 Follow these steps to present this experience for end users:
Note that the steps above would be repeated for each service auth that the end user provides.
Note on updating Solution Instances
When you (not end user) publish a new version of a Solution, there are two types of updates that would happen to all Solution Instances linked to this Solution:
- A 'lazy' update (no new config or auths are required)
- A 'breaking changes' update (i.e. requires new auth and/or config data) whereby you will have to notify End Users to edit their integrations as above For more details, please see our guide to Updating Solutions and Instances.
User deletes integration
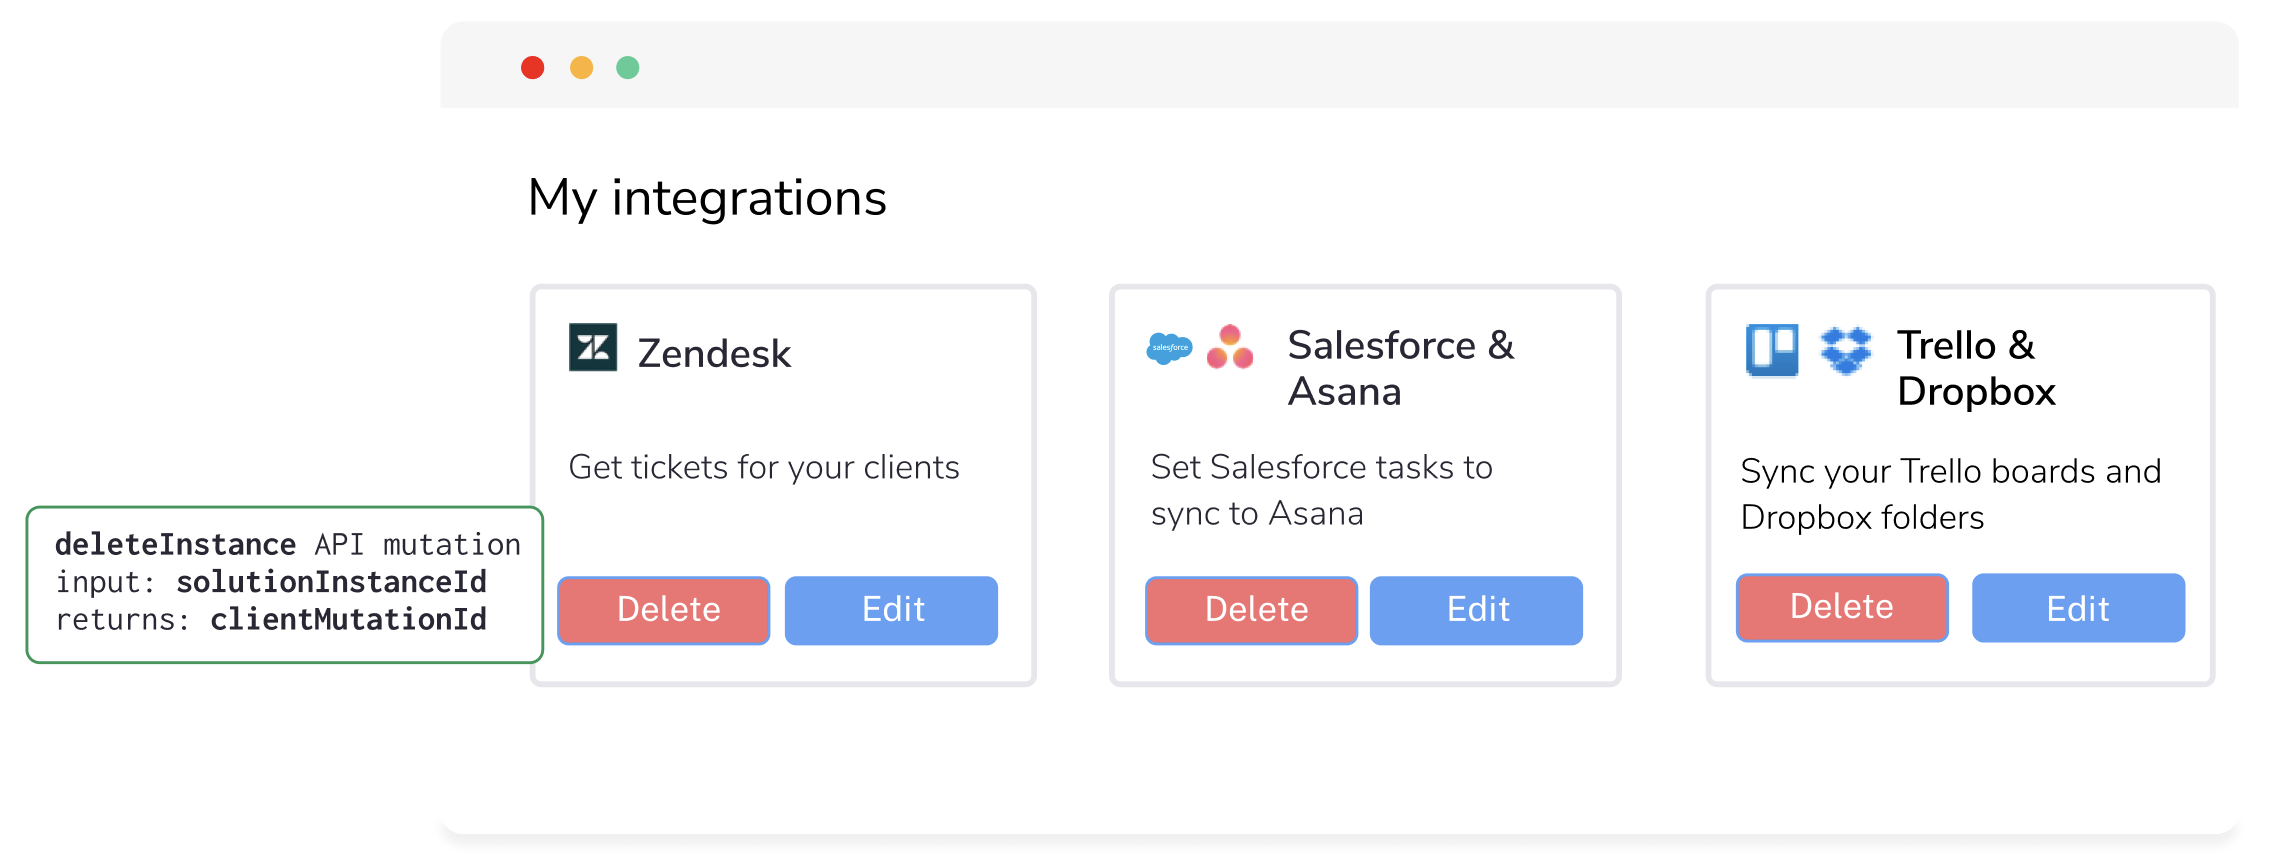
Delete solution instance
Users may want to delete the instance they no longer wish to use and you can achieve it by following the steps below: